So, you want to start a blog? That’s great. You’ve come to the right place.
It’s exciting once you know how to create a blog and make money online. It can lead to many valuable opportunities that can be very rewarding.
The easiest way to get noticed online today is to have your own website.
Having a website will allow you to build a platform. A platform you can use to deliver your message or product to potential customers.
It is an essential part of any business done on the internet.
Do you want to make money online?
I’ve put together this start a blog tutorial to show you how easy it is to get started.
What You Will Learn
By following this step-by-step guide, I will teach you:
- How to set up hosting with your own domain name
- How to install WordPress and setup a blog
- How to install and use WordPress plugins
- How to set up blog security
- How to set up automatic backups to prevent loss of your hard work
- How to optimise your blog for the search engines: SEO
- How to set up links to make money with your blog
- How to make your blog look good
- How to make your blog mobile responsive
- How to add an email subscription opt-in form
- and much more…
Choose A Blogging Platform
To start with you need to choose a blogging platform.
There are many ways to set up a website but I’d recommend is a self-hosted WordPress blog.
Don’t waste your time with a free blog. They’re limited, appear less professional and you won’t own it. In fact, I can’t think of any reason to create a free blog other than the zero start-up costs.
Many beginners make this mistake. When starting a blog, they choose the wrong blogging platform.
Thankfully, you found this tutorial, so you’ll avoid this mistake.

WordPress is the best blogging platform. It’s also the most popular. Not only is it inexpensive, but it’s quick and easy to use. Professional bloggers use this method, including myself. InternetHabits.com (this website) is a self-hosted WordPress blog.
If you want to build an audience, look credible and make money blogging, start a self-hosted blog.
On this page, I’ve taken the time to break down everything you must do to set up your own blog. It’s a step-by-step guide to make it as easy as possible for you.
Also, I should mention that you don’t need any technical skills to do this. No coding knowledge is required. It really is that easy!
Ready to get started?
Let’s go!
How To Start A Blog: Video Tutorial
In the video tutorial below you can watch over my shoulder as I walk you through each step in less than 60 minutes!
Not bad for setting up a business platform, eh?
Or, if you prefer to read how it’s done, continue to the step-by-step text tutorial below. This will also save you from having to take notes should you watch the video.

Pressing play on the video(s) will set a third-party cookie. Please read our cookie policy for more information.
Click Here to Read the Video Transcript
In this video, I’m going to show you how you can start a WordPress website or blog the right way. Avoid the newbie beginner mistakes. Look professional from the very start and you’ll learn how you can make money online. Basically, it’s an easy step by step tutorial for beginners.
What’s up, everybody? I’m Pete Williams. And today we’re going to be talking about one of my favourite subjects, which is how to create a website. I’m going to show you every step you need to take to start a blog the right way.
If you’re new to this channel, it’s all about learning new skills that we can develop into habits with the help of tools and services available to us on the Internet. The end goal; a happier, healthier, more productive life where you can work less and make more. So if that sounds like something you’re into, make sure you hit the subscribe button and the bell notification so you don’t miss out on any future content.
Right? Let me start by asking you a question, are you a dreamer or an action taker?
Dreamers have a lot of ideas. They want to start a business, they want to start a blog, they want to be a YouTuber, but they never actually take any action towards these ideas, so they forever stay just a dream.
On the other hand, action takers, they know what they want, but most importantly, they do something about it. They take action!
If you want to achieve your dreams, you’ve got to take action.
Don’t worry if there’s hundreds of steps involved to get what you want, get started on step one. If you focus too much on steps two to one hundred, you’ll become overwhelmed and you’ll never get anywhere. That’s something I’ve been guilty of myself.
You don’t have to figure out everything before you start. That’s often impossible. Instead, concentrate on step one, complete that and then worry about the next step.
You’ll learn everything along the way, start and then learn. Not trying is a lot more painful than trying and failing. At least you’ll know you tried and you won’t grow old resenting yourself for something you never did.
So be an action taker and actually execute each of the steps as you follow along with this tutorial. It may seem a bit lengthy, but unlike most other tutorials you’ll find here on YouTube, this isn’t just a brief overview that doesn’t really help you get anywhere. You’ll actually have a functioning website that’s set up well and ready to help you share your value with the rest of the world and make some money.
Now I’ve been creating websites for over ten years and let me tell you something, you’re extremely lucky. It’s so easy to start a website nowadays, compared to when I started.
It used to be like, aggghhhh… I need to learn how to code HTML, CSS, JavaScript, constantly Googling how to code certain things, but not these days now it’s super easy. If you’re able to browse the Internet, you’ve probably got the skills you need to start a website. If you’re still on the fence 100% recommend giving it a go.
So in this video, I’m going to break down everything you need to know to create your own website and why you should have a website in the first place.
I’ll share the correct platform to use to create your blog because getting this wrong is one of the most common newbie mistakes.
I’ll cover how to design your blog. Not that this really matters when you’re getting started unless you’re putting an existing business online.
I’ll teach you how to make sure it’s user friendly, and by that I mean it’s mobile-friendly. It’ll work no matter what device your visitors are using.
You’ll learn how to set it up for the search engines with search engine optimization. And again, not that this is something you need to worry about when you’re just getting started, but it’s nice to have in place, well, the basics in place to begin with.
You’ll learn how to set your blog for social sharing so people can spread the word if they like your content.
One of the most important things, we’ll make sure that your blog is safe with security and regular automatic backups in place to prevent loss of your hard work just in case your website gets hacked.
I’ll teach you how to capture email addresses, and this bit is extremely important and explain why later in the video.
And I’ll even show you how you can add affiliate links to your blog so you can make money blogging, and start to generate passive income, once you have an audience.
Oh, and just a quick side note before we continue. Please don’t be put off by the length of this video. There’s a lot to cover, but the actual doing part is fairly quick.
I provided the timestamps below the video if you want to skip past me explaining why you should start a website, or you’d rather just get started or skip to certain sections of the video.
So even though it’s not the most exciting video you’ll ever watch, you should have a fully functioning website by the end of it, and I personally think that’s quite exciting.
Oh, and one last thing, if anything looks different to what you see in the video, don’t worry, the service providers and developers are continually updating and improving their products so things change all the time. The steps that I’m teaching you will still be pretty much the same so you should still have absolutely no problem following along.
Speaking of which, if you prefer to follow step by step instructions with text and images, head over to my blog post. It contains links to all the resources you’ll need for this tutorial. In fact, you’ll find all the links you need below this video.
So, why should you start a website?
Having a website is something that I recommend to everyone, whether it’s for work or for personal use.
The benefits: So for your personal life in terms of personal development;
If you’re blogging every week or creating videos if that’s your preference, you’ll become better at that skill. For example, the more you write the better you’ll get at writing. You’ll likely also improve your communication skills too. And the more you create, the more ideas you’ll get.
You’ll have a presence on the Internet, which gives you networking advantages and reach. Now what I mean by that is you’ll have the potential to get discovered by way more people. Huge benefit.
This exposure can help you get discovered by others, which can lead to a lot of interesting opportunities. For example, you could get invited to write articles for other well-established websites and publications. You could get invites to podcasts and interviews. You could also make new connections via a common interest.
And then there’s the benefits to your professional life.
It’s becoming fairly common for potential employees to Google you as part of the interview. So you could say that your website acts as kind of like an online CV. It gives you more exposure, people can relate, see common interests.
Plus, it’s an easy place to direct people if they want to learn more about you. Kind of like a digital business card.
And finally, what most people tend to favour the most. You can monetize your website if you want.
The main reason for your website should be to provide value, but you can make money from it. There’s plenty of people out there doing it, and there’s even some that make six to seven figures a year!
One of the reasons it’s possible is because your website can work for you 24/7.
I mean you’re not going to get rich straight away and you’ve got to remember that. You’re going to have to put in consistent hard work, but just know that the hardest part is getting started. Just take massive imperfect action, remain consistent and you’ll improve over time.
So what should you do with your website?
My recommendation is that you just keep writing at least one article or blog post per week for the next year or two and share it on social media.
And yes, it probably will just be your friends and family that reads it at first, but don’t get discouraged by that. I mean, one of them might read it and think, oh so and so at work might like this and they’ll share it with them and then your work is getting discovered by others.
Plus, if your content is good and improves over time, more and more people will likely discover it anyway. But like I touched on earlier, you’re not going to get rich quick. It takes time and you have to put in the work.
But if you stay consistent and regularly put out new content each week for the next one to two years, I’d be surprised if you haven’t created an opportunity for yourself. In fact, I’d be surprised if you haven’t created a plethora of opportunities for yourself.
The hardest part is getting started, so you need to take massive imperfect action.
Don’t worry about the more technical things at first. SEO, what your website looks like, how to monetize it. Just focus on creating valuable content and sharing it.
Just make sure that you stay consistent. Post at least weekly to your website and share it to all your social media platforms. Just get into the habit of creating content, publishing it and then showing your work to everyone on the internet.
And finally, if you’re worried or scared of putting yourself out there, it’s perfectly fine to feel like that. Loads of people feel like that to begin with. You’ve just got to get started and you’ll soon realise it’s not so bad.
In fact, if you’re put in consistent hard work, you’ll soon discover that your website has the potential to completely change your life.
Now hopefully that’s enough to make you agree that starting a website or blog is a great idea. But what should you blog about?
You need to think of a topic that you can write or make videos about on a regular basis.
Now you might be here because you’ve got a business idea already or an existing business that’s offline so you need to create a website for it. But what happens if you’re creating a website just for you for personal use? What should you actually write about?
I’ve got a short exercise that should help with this. So grab yourself a piece of paper and a pen or open your favourite note-taking app and I’d like you to note down the following:
What you’re good at, what you’re interested in, what you enjoy and what you’re interested in learning about.
Once you’ve wrote all those down, that should give you plenty of ideas of what you can write about for your website. If you need a bit of help, you could use me as an example.
I like creating websites, content creation, personal development, productivity, tech, money management, automation and health and fitness.
So if you’ve got something along those lines, just note them down.
At the end of the day, the best way to look at it is this; Could what you’re planning to write about be useful to at least one other person in the world?
Think of all the existing businesses that already exist out there. They all provide value. That’s what you need to do.
So now you know your website topic, you need to create a website, and this is the bit that worries most people, but there’s no need to worry because it’s actually a lot easier than you think.
There are three things you need to create a website.
Number one a platform, number two website hosting for that platform, and number three a domain name.
Let’s start by talking about choosing a domain name. Choosing a domain name for your blog is a very important part of the process, and it’s essential for branding.
Take your time here and choose wisely.
I’m going to repeat that because of how important it is. Take your time here and choose wisely.
Now the domain name for my website is internethabits.com. Now you’ve no idea how long this took me to come up with.
I mean, at first I was thinking about using my name, but because my name is really common, that was already taken, so I couldn’t use that.
I was thinking about using keywords about the things I was going to write about. But when I was trying to think of a combination of them as something cool to make the website name rememberable, already taken. So it’s a difficult process.
So if you’re having trouble choosing a domain name because it’s difficult, I’d recommend that you either go with your name, if it’s not a common one like me that’s already taken or just use a branded domain name like I have.
To make this process a bit easier for you, when choosing your domain name, you should consider;
Is it easy to remember? Is it easy to say and spell? If it includes your name and that’s a long name, you might want to use a shortened version if necessary. Don’t use Hyphens in your domain name. For example, internet dash habits dot com. Domain names with Hyphens are harder to remember. Plus, you’ll likely find it annoying when you’re having to tell someone your website address.
Don’t use numbers or special characters because you don’t want to explain that you mean the number 6 rather than the word six when telling someone your website name.
Keep it simple. So don’t use words that you can spell in different ways. For example, the word two or the word for, the various spellings on the screen now.
You’ve also got to make sure, ideally, that you keep it short so it’s easier to remember.
If you want to you could include keywords for your blog’s topic in your domain name. For example, Bluehost.com is a hosting company or there’s Dailyblogtips.com, which is a blog that provides you with daily blogging tips.
Basically, it will give your readers an idea of what they’re likely to expect. Your domain name is a very important part of your blog and it’s essential for branding. So I’ve said it again and I’m repeating myself, take your time here and choose wisely.
Once you’ve decided on your domain name, you’ll need to choose the platform to host your website, and this is where most beginners get it wrong.
I’m often asked how to start a blog and whether they should use Tumblr, BlogSpot, Squarespace, Wix or anything like that because they’re free, they’ve seen the ads or their favourite YouTuber’s mentioned them in a sponsored video.
Yes, some of them are free, but most platforms are paid. And if you want to take your website seriously, which I highly recommend, then you should pay for a service.
The reasons you should avoid the free platforms;
You don’t own your blog and it could be shut down. There’s a lot of limitations on what you can do. You have restricted control over your website design, functionality, optimization, and monetization.
You don’t want to look like a beginner, and by that I mean, your domain name will be an extension of the service provider’s name. For example, if I chose Tumblr as my platform for Internet Habits, the website address will be https://internethabits.tumblr.com instead of just https://staging.internethabits.com.
Now, a quick caveat. If you’re not currently in a position where you can afford to pay for a service, then just sign up for a free account on SubStack or something similar.
Just focus on creating content on a weekly basis, developing that skill and forming a habit until you’re in a better financial situation where you can afford it.
And if you can afford it, but you’d rather use a free service, then I wish you good luck. But my recommendation is that you invest in your future because it’s genuinely the sort of investment that has the potential to change your life.
Please don’t waste your time focusing on the wrong things, like trying to find the best free option just to save yourself a few dollars each month when your time could be spent creating valuable content that could make you a lot more than a few dollars. Save a few, make make a lot.
Oh, and I should also mention that my recommended platform isn’t very expensive, so if you can cut back on buying a few drinks per month, you should be able to afford this without any problem.
So now onto the platform. As I mentioned at the start of the video, the blogging platform that I recommend is WordPress. WordPress is inexpensive. The platform itself is free, but hosting will cost you a few dollars per month.
It’s quick and easy to use. It’s used by professional bloggers. Plus, it’s much easier to customise, thanks to themes and plugins that can help you to achieve pretty much anything you want to do.
Now, there is a free version of WordPress, but that’s just like Blogger and Tumblr, etc. It’s limited and restricted to their terms and conditions.
The self-hosted version of WordPress gives you full control and 100% belongs to you.
Now don’t get things confused here. They’re both free, but one is hosted for free, and that’s the restricted one. The self-hosted one where you’ll be paying just a small amount for hosting is the one that we’re going to go with.
One of the great things about WordPress is you don’t need any technical skills. There’s no coding knowledge required. It really is that easy.
Plus, if you want to be taken seriously, you need your own domain name that’s not a subdomain of another platform. Also, you’ll appear more professional with your own self-hosted blog rather than using a free blogging platform.
If you’re going to take your blog seriously, start off correctly and do things right the first time. Don’t overthink it. The content that you produce is much more important, so follow the rest of this tutorial, get your website set up and put your effort into creating valuable content on a regular basis.
So come on, let’s get started.
So, now you can see my screen, you can watch over my shoulder as I show you step by step how you can set up your very own self-hosted WordPress blog.
Now, before we can do anything at all with WordPress, you need two things in place; web hosting, which is a service that keeps your blog visible online and a domain name such as google.com or, in my case, internethabits.com.
Now, the good news is you won’t have to buy these separately. The web hosting service that I recommend to people that are just getting started online actually provides you with a free domain name when you sign up for one of their hosting plans.
My recommendation, which you can see on your screen is, of course, Bluehost.
There’s a few reasons why I recommend Bluehost when you’re just getting started. Firstly, is that you get the free domain name. Secondly, you get a free SSL certificate so your website visitors will always be protected. Third, they offer support that’s available 24/7 via phone, online chat and email, and arguably the most important when you’re just getting started online. The price. Bluehost are cheap.
Now I know what you’re thinking. Cheap doesn’t mean the best, but you don’t need the best when you’re in the setup stage, you need good enough, and that’s exactly what their shared hosting plans provide.
A reliable platform that you can use to build your audience and grow your blog. Once your blog is established and you have a lot of regular visitors, there’s nothing stopping you from upgrading your hosting or even moving to a completely different host.
Oh, and I forgot to mention they offer a money back guarantee. If you give them a try and you’re not satisfied, you can get a full refund within 30 days of signing up. So let’s get started.
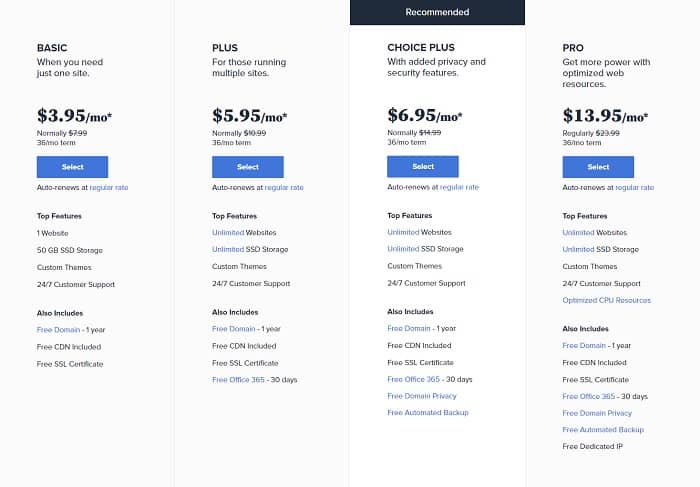
The first step is to sign up for Bluehost. You’ll find a link to Bluehost and all the other services I recommend below the video. Signing up to Bluehost is easy. Just click the Get Started button and then you’ll be presented with a few plans. I recommend going with either the Plus plan or the Choice Plus plan.
The reason, unlike the basic plan, it allows you to have unlimited websites and unlimited storage space. However, as you’re just getting started, the basic plan will be just fine.
Remember, there’s nothing stopping you from upgrading your hosting at a later point in time.
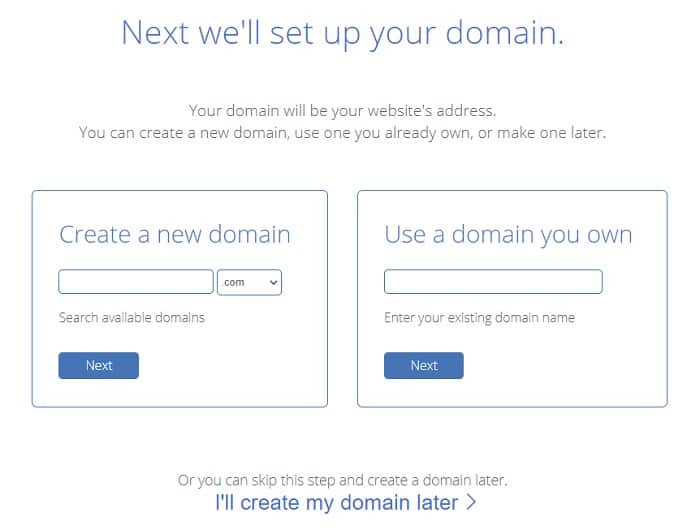
Once you’ve chosen your hosting plan, it’s going to ask you to register a new domain. Now, we’ve already discussed that earlier in this tutorial, so simply enter the name you came up with and click next.
As my main blog is all about Internet marketing and habits, I’m going to register Imhabits. The system will then check if that domain is available. As you can see the domain was available for me. So the next step is to fill out your personal details. I’ll do that quickly now.
Next, you have to choose your plan length. You’ll see, the longer you sign up for, the cheaper it is.
And next you have the choice to customise your package. You could remove domain privacy protection to save yourself about one dollar a month. Although it’s worth noting. If people look up the information on the domain, they’ll be able to see your name and address. So if you want to keep this private check this box.
And you can also remove all other options because I’ll show you how to do that later in the tutorial for free.
The final steps on this page is to enter your payment details, which I’ll do quickly now. And then finally agree to the terms and conditions, and then click Submit.
Now we’re presented with a load of further information and upsells. You don’t need any of these, so you can just click no thanks. And then once your payment details have been approved, you’ll be presented with a welcome to Bluehost page confirming your purchase was successful, and you should also receive a confirmation email in to your inbox too.
Now the final step before you can log into your Bluehost account is to generate a password. So click on the Create Your Password button and you’ll be taken to the Manage Your Password screen where you can create your password.
I’d recommend using the Password generator because it’ll help you create a strong and secure password that will be difficult for other people to hack. Once you’ve created your password, read the terms and conditions, click the box to confirm that you agree to them, and then click Continue to create your Bluehost Account.
The next step is to log into your account if you’re not automatically redirected there. At this point you should see your Bluehost Account dashboard. You’ll want to make sure you’re on the hosting page and then look down the screen for the website section.
Within this section, you’ll see a number of options. The one you’re looking for is Install WordPress.
Once you’ve found it, go ahead and click on Install WordPress. On the next screen you should see a couple of options, one of which will be to manually install the WordPress script yourself and you may see some offers from Bluehost where they’ll charge to do it for you. You don’t need this. It’s really straightforward. We’ll go with the Free option. So click on the Install button and then on the next page, select the domain where you’d like to install WordPress.
In most cases, it will be the default option. Once you’ve made your selection, click the Check Domain button. Once Bluehost has checked that everything is okay, you’ll be presented with one last screen.
At this point, I’d recommend you click the Show Advanced Options button, enter your site name, and then take a note of your admin username and password. You’ll need these each time you log in to WordPress.
And then finally check the box to confirm that you agreed to the GPL v2 terms and conditions. Then it’s just a case of clicking the Install Now button.
And now we play the waiting game as Bluehost starts to install WordPress to your hosting account. You’ll see at the top of the screen there’s a progress bar. For the purposes of this tutorial, I’m going to fast forward. Once you’re notified that your WordPress installation is complete, click the View Credentials button.
Click the View button to be presented with your username, password, site URL and Admin URL. Note these down and then take a big sigh of relief. You’ve now completed the boring part of the tutorial.
So now the boring parts are out the way, click on your Admin URL and you’ll be taken to the WordPress Login page for your new blog. Now, enter your login details.
Once you log in with your login details, which I’ll do now, you’ll be taken to your WordPress dashboard. Think of this as the admin area of your new blog.
Now, at this point in the tutorial, you should give yourself a pat on the back. Congratulations. You now have your very own self hosted WordPress blog.
The only downside to this is it won’t look very good just yet. In fact, to begin with, you’ll just see a Coming Soon page. Well, that’s what your visitors will see. You are obviously able to see what the actual blog looks like and we’ll get to that shortly.
Next, we’re going to take this very basic blog and customise it so you don’t look like a beginner.
We’ll make it user-friendly, attractive, set up for social media sharing, safe and secure, able to capture email addresses, which is extremely important. We’ll get to that towards the end of the tutorial. And I’ll even show you how to add affiliate links to your blog.
If you want to make some money online, affiliate marketing is a great place to get started. In fact, it’s how I started making money online. So if you want to follow in my footsteps and start making some money with your blog, keep watching because this is where it starts to get a little more interesting.
When you’re logged into WordPress, you access all the sections via the menus on the left-hand side.
From here you can access things such as posts, pages and settings, and that’s what we’re going to take a look at first. Now the majority of the settings will be personal to you so I can’t help you with these, but I’m going to guide you through a few of the basics.
First, hover your mouse over the Settings menu on the left-hand side and you’ll see a little sub-menu appear. From here, click on General. This will load the WordPress General Settings page.
From here you can set things like your site title, tagline, email address, time zone and dates. That kind of thing. You’ll see, my site title is already set because I did this as part of the setup stage within Bluehost. However, my tagline is not set up, so I’ll quickly do that. Now, as this is my demo site, I’ll put something simple like Internet Habits demo site.
Next, we’ll go down and fill out the rest of these settings, including email address, which I’ll quickly enter. Check the time, date, and then most importantly of all, remember to click Save.
You’ll see a notification at the top of the page to confirm it’s been successful.
The next thing you should do is fill out your writing, reading and discussion settings. And then once that’s done, head over to the Permalink Settings page.
In my opinion, this is one of the most important settings you can change. Instead of sticking with the default Permalink structure, I suggest changing it to either post name or custom where you include a category and then your post name.
The reason for this is that the URLs to the pages on your website will look a lot nicer and be easier to remember. For example, let’s say you had a page about starting a blog. What would you prefer to have? A web address such as MyWebsite.com/startablog or MyWebsite.com/?p-123.
Exactly. The post ID will mean nothing to anyone but you, and that’s why it’s important you make this change.
Once that’s done, click Save and then head over to the Privacy Settings page. On this page, you’ll be able to link to your Privacy policy. Now, I doubt that’s something you have at this point, but it’s something important to your blog and you’ll need it in the near future.
I explain this in a little more detail in my free email series, which you can sign up for on the blog post that accompanies this video. You’ll find the link to that listed below.
So now we’ve completed the WordPress Settings, the next step is to install some WordPress plugins. These are simply additions to WordPress that allow you to increase its functionality and its features.
In fact, they are one of the key reasons to build your website with WordPress. Head over to the left-hand menu and click on Plugins. You’ll be presented with a list of all the plugins that are already installed on your blog. Now, any of these that you don’t want, you can delete.
What we’re going to do is add a few more, so click on the Add New button and then on the next page, head over to the search field. We’re going to install the following plugins:
Yoast SEO, iThemes Security, UpDraftPlus WordPress Backup Plugin, Contact Form 7, Google Analytics by Monster Insights, WordPress Share Buttons Related Posts and Google Analytics by Shareaholics, and finally, Pretty Links.
Once you’ve successfully located each of the plugins, click the Install Now button. I’ll fast forward through this process because I’m sure you don’t want to watch me install each of the plugins.
Now that’s done, we’ll head back to the Plugins page. Here we’re going to activate each of the plugins we’ve just installed.
Now you can do this two ways. Activate each of the plugins individually, or select each of the plugins by putting a tick in the box next to it and then choose Activate from the drop-down menu and click the Apply button.
Once all the plugins have been activated, we then need to configure each of them. So that’s what we’ll do now.
We’ll start with Yoast SEO, which you’ll find has appeared as a new menu inside your WordPress dashboard.
In fact, I should point out each time you activate a new plugin, it either adds a new menu to WordPress or appears as a new option under the Settings submenu.
So now we’ll click on SEO and you’ll be taken to the General Settings page for the Yoast SEO plugin. The reason we’ve installed Yoast SEO is to help optimise your blog for a better chance of ranking in the search engines.
A bit of free traffic from Google and Bing? Don’t mind if I do!
Anyway, let’s get back to configuring Yoast SEO. If you click on the Need Help button, you’ll find that Yoast lists, video tutorials and a knowledge base within their plugin. This comes in extremely handy if you’re not sure what to do with each section. However, the easiest way to set up Yoast SEO is to use their Configuration Wizard, so that’s what we’ll do now.
Click on Configuration Wizard. The next screen you see will be the first page of the wizard. Click the Configure Yoast SEO button and then follow the instructions for each page. I’ll quickly complete that now. Once you’re done, click the Close button.
Now that your blog is configured for SEO, next we’ll move on to setting up iThemes Security. So locate Security on the left-hand menu and give it a click.
The reason we’ve installed iThemes Security is to protect your website. Now I don’t know about you, but the last thing I want to happen is for my website to be hacked. You could lose all your hard work and it could cause a lot of extra hassle having to fix it. So iThemes is used to help secure WordPress.
The first time you access iThemes Security, you’ll be greeted with a security check. On the screen, you can see the benefits of activating this. Go ahead and click on Secure Site. iThemes will then enable the recommended features and give you the option to activate network brute force protection. I’d recommend entering your email address and activating this. Once that’s done, hit close and then enable any further settings that you feel you need.
We’ll then head on over to the Settings menu and select UpdraftPlus Backups.
The reason we install this plugin is because if something were to go wrong, you can simply restore your last known good backup with very minimal data loss. So once you’ve loaded the page for the Uptraft Plus plugin, first you’ll want to head over to the Settings tab.
To begin with, we’ll set up a schedule for our files and database backup. I suggest weekly for the files backup and daily for the database backup. Then it’s just a case of choosing your preferred remote storage, completing the remaining settings for that, and then clicking Save changes.
That’s your automated backup in place. So next we’ll head over to the Contact Form 7 plugin page where I’ll show you how to create a contact form for your blog so that people can get in touch should they feel the need.
Once you’re an established blogger, you may find that companies get in touch with sponsorship proposals and such like or maybe other bloggers will reach out hoping they can write a guest post for your blog. No matter what the reason, it’s a good idea to have a contact form on your blog, so that’s what we’ll do now.
As you’ll see, the Contact Form 7 plugin comes with an example form already installed. Instead of deleting this, it makes more sense to just click edit. This way you can see how the form is set up, modify it to your liking, click Save, and then add it to your blog.
So make any of the necessary changes to your form, save them, highlight the shortcode for the form and click Copy.
We’re now going to head over to the Pages section of WordPress, where we’ll create an example Contact page. So click Pages in the left-hand menu, and then once that’s loaded, click the Add new button.
The first thing we need to do is give the page a name. In this case, it’s quite straightforward. We’ll go with Contact. As this is just an example page, I’ll include some sample text, and then in a new block, we’ll paste in the shortcut that we copied from the Contact Form page in the last step.
As this is just an example page, I won’t bother filling out the Yoast SEO section for this page, and instead, we’ll just head up to the top right-hand corner and click the Publish button.
Once the page is published, we’ll click the View Page button, and then we’ll head over to take a peek at how it looks. As you’ll see, we now have a Contact page on our blog.
Don’t worry that it looks so basic. Remember, this is just a default WordPress theme. We’ll be fixing this at a later step in this tutorial.
The next step is to head back to your WordPress dashboard and then locate Insights in the left-hand menu. Once you’ve found it, give it a click.
Now, the reason we set up this plugin is because it enables Google Analytics. It’s a free service that tracks and reports on your website traffic.
It provides you with visitor insight, and you can use the data to help grow your blog, so it makes sense to have it set up from the start. This plugin from Monster Insights allows you to see basic analytics data from inside your WordPress dashboard.
Once you’re on the Plugin page, locate the Google Authentication section, and then click Connect Monster Insights. You’ll be taken to the Monster Insights website, where you’ll be instructed to connect your Google Analytics account. Follow the instructions, and then head back to the Monster Insights page on your blog.
Once you’re there, locate the Set Up Wizards section, and then click on the Launch Setup Wizard button.
Follow the instructions in the wizard to properly set up your Google Analytics account, and then once you’ve completed the Settings, locate Shareaholics in the left-hand menu on your WordPress Dashboard.
This is the plugin that we’re going to use to make it easy for your blog visitors to share your content on social media. It can help get more eyeballs on your content, and at the end of the day, that’s the main goal.
Now, the first time you access the Sharerholics plugin, you’ll be greeted with a welcome to Shareaholics message that contains a little bit of blurb about the plugin and the Get Started button. Review their Terms of Service and Privacy Policy, and then click the Get Started button if you agree with them.
After you agree to the terms and conditions, you’ll be taken to the App Manager screen where you can customise the settings for the InPage Share buttons and the related content.
For the sake of this tutorial, I’m just going to demonstrate how you can customise the InPage Share buttons that appear below the post content. So I’ll click on the Customise button and then as you’ll see you get presented with all the different options that you can use to change the appearance of the social sharing buttons. I’m quite happy with the defaults, but I don’t particularly want Pinterest on there, so I’ll remove that and then save the settings.
Once that’s done, I’m going to click on the Edit Settings button and then go in here and add my Twitter handle. Once that’s done, I’ll choose my link shortener of choice. In this case, I’ll go with Bitly. Depending on the choice you make. You may have to enter some login details and then click Save Settings.
You can then feel free to edit any of the remaining settings, and then once you’re done, remember to click the Save Changes button.
Your blog is now in a good place. It’s optimised for the search engines, secure, has automated back up, it’s set up so your visitors can contact you, has Google Analytics enabled, and its content is set up for sharing to encourage growth.
But there’s still plenty more you can do to improve your blog even further. And it’s these next steps that are arguably the most fun.
At this point in the tutorial, we’re finally on the bit where you get to modify the look of your blog to make it look a bit more pleasing to the eye and professional.
To do this, locate Appearance in the left-hand menu and give it a click. You’ll be presented with the Themes page, but before we get into that as a reminder, we’ll just have a quick look at what your blog currently looks like with the default theme. As you’ll see, it’s fairly plain, and there are the social sharing buttons that we added in the last step.
So now we’ll head back on over to the Themes page and this is where you can modify your blog’s overall look. It’s the theme that’s responsible for the design of your blog, so it’s fairly important that you choose something that’s half decent.
But don’t worry, you can always come back and change this at a later time.
So when it comes to picking your theme, you pretty much have three options. You could pay someone to design your theme for you. This is brilliant because you’ll get exactly what you want. However, each time you need to change, you may have to pay again.
The next option is a premium theme. These are themes that are developed and supported by expert WordPress coders and should continue to receive support.
And then finally you’ve got a free theme. The downside to this is that it’s very unlikely that they’ll continue to receive support.
So when it comes to WordPress themes, it’s pretty much a good example of the good old cliche you get what you pay for. Investing in a good theme now can save you time, hassle and additional expense further down the line. So I’d invest a fair bit of time now to choose a theme that includes all the features you’d like on your blog.
Now trust me on this one. Once you’ve chosen your theme, do not waste time trying to perfect the blog design. Now is not the time to worry about how your blog looks and responds.
Learn from my mistake. When you’re just getting started, you need to focus on creating content and promoting that content. You can worry about perfecting the design once you’re more established.
So what things should you consider when choosing a theme for your blog?
I have a few rules:
It should be simple and clutter-free, easy to customise, so changing things such as the colour and logos, which can be done from within the theme options.
It should load quickly and be optimised for speed, and this ties into it having clean code. Themes that aren’t coded well will likely make your site speed suffer, and this can affect your search engine ranking.
Your theme should also follow the latest coding standards as this will make your site compatible with future changes to the Internet. It will also make sure it’s cross-browser compatible.
You’ll want your theme to be mobile friendly and responsive. If it isn’t, this can affect your search engine ranking and more importantly, more and more people are using phones and tablets to browse the Internet. You’d be making a huge mistake not to account for them with your theme.
It should also be secure. As I mentioned earlier in the tutorial, you don’t want someone hacking your site. The more you do to prevent this, the better. So choose a theme that’s coded to make sure it’s secure.
You also want to make sure your theme receives updates as being able to update WordPress and your theme to the latest secure version is vital.
And the last two things I think you should look out for are; support. That way, if you encounter a problem with your theme, it’s always nice to know you have support available to help you solve the issue. And last but not least, community. If numerous people are using the theme, you can bet there’s a strong community you can turn to for support.
So if you haven’t already guessed, my recommendation is to go with a premium theme.
There’s literally thousands of these to choose from. So to save you some time, I’ll link my recommendations below the video. You can also find them listed on my resource page, which you’ll also find linked below the video. That’s not to say that you need a premium theme though. You’ll be able to get on just fine with a free theme.
As I recommend a premium theme, that’s exactly what I’ll be installing for this demonstration. The theme was purchased and downloaded externally, so I’ll need to head over to the Upload button and give it a click. This will take me to the page where I can upload my theme. And below that section you’ll see a load of other themes that you could choose from. If you’re not installing a premium theme, it’s just a case of finding the theme of your choice, installing it and then activating it.
You’ll see these steps shortly when I activate my premium theme. So now I’m going to click on Choose File so I can select the premium theme that I need to install. The theme that I’ll be using is the Aspire Pro Theme by Studio Press. This is based on the Genesis Framework, so it involves two installs the Genesis Framework itself and then the theme. So I’ll select the first file and then click Install Now.
As you can see, this is installed successfully. So now I need to repeat the process for the second file. Remember, your theme may only have the one file, so you may not have to do this. The first file I installed was the Genesis Framework. So the next file I need is the Aspire Pro theme, so I’ll install that and as you can see it’s telling me that this theme requires a parent theme. It’s checked that it’s installed, found that it is and then successfully installed the theme.
The next step we need to take is to activate the theme. And now, as you can see, WordPress is telling me that the Aspire Pro theme is active.
So now it’s time to get creative. This is where you get to modify your blog and change things such as the colour, the layout, the background, and so on.
Now, dependent upon the theme you’ve activated, the way you go about doing this will be different. You should be able to find instructions from the company or developer that you purchased a theme.
This is another benefit of a premium theme. If you’ve chosen a free theme, you may not be able to find these instructions or be able to reach out to anyone for some help. All of the themes I recommend provide this information via guides and or video tutorials.
So for the purposes of this demonstration, I’m going to click on customise and then work through the options that this theme provides. The Aspire theme from Studio Press has a number of options.
As you can see, you can change the site identity, the front page background images, which you can’t currently see, but I’m going to modify the settings so that the front page does not actually show the blog, and instead that’s moved onto a separate page specifically for the blog. The front page will then become the blog’s home page, which tells you everything about the blog.
Within the settings you can also change the primary colour of the blog, the blog’s header image, which is where you can add your blogs logo and a number of other things.
So I’ll go ahead and make all those changes now. Oh, and I should point out this will include me importing the blog themes demo data so I can show you what this theme is capable of.
So as you can see, this is quite an attractive theme with built-in email opt-in forms, sections to showcase your products and testimonials and clickable links to other sections of your blog. I’m sure you’ll agree it looks the part.
So now we’ve got a professional-looking blog. It’s set up for the search engines. It’s secure. Has a regular backup. People can make contact with us. We can see the analytics and visitors can share our content.
Take a big sigh of relief. We’re finally at that part in the tutorial that most of you have been waiting for. How to Make Money With A Blog.
Now, there’s a number of ways that you can make money online with your blog, with the easiest being promoting your own products. But when you’re just getting started, it’s very likely that you won’t have anything to sell. So my recommendation is to promote other people’s products with affiliate marketing.
For those of you who haven’t heard of affiliate marketing, it’s simply the promotion of someone else’s product for a cut of the final sale.
For example, if I recommend a hosting service to you and you purchase it via my affiliate link, I get a percentage of that sale. Now it won’t cost the person making the purchase a single penny more. It’s just like them buying direct from the seller. As an affiliate marketer, you’re paid for the recommendation or promotion part of the sale.
In simple terms, you recommend a product or service, someone else buys it via your affiliate link and then you or the product or service owner benefit from that sale. And of course, the person who makes the purchase will also benefit from your recommendation.
That’s just me dropping in a little hint. You should never, ever recommend a product just to make the commissions. Only ever recommend products that you would pay for and use yourself.
Trust me, it will look after your reputation and pay off in the long run.
In fact, I’ve put together an affiliate marketing guide where I share all the best practices that I’ve picked up throughout the years to help you make the most of your affiliate marketing efforts.
You can find a link where you can sign up for the guide below the video or on the blog post that accompanies this video.
When you’ve found a product or service that you want to promote to your audience and you’ve checked and confirmed that they have an affiliate programme, first, familiarise yourself with the terms of their affiliate programme, and then once you’re happy apply to sign up.
The reason I bring up the terms of affiliate programmes is I don’t want you to do anything wrong in your affiliate marketing journey.
There’s a lot of rules and regulations that you need to follow. For example, I should point out that you must inform your blog visitors upfront that your site includes affiliate links. The last thing that I want to happen is for you to get in trouble with the Federal Trade Commission, so please, always make sure that you’re upfront and honest with your blog visitors and never try to mislead them.
So, once you’ve chosen your affiliate programmes and been accepted to them, the next thing you’ll want is a way to manage your affiliate links and also a way to make them more attractive.
I’ll put an example of a typical affiliate link on screen now.
Now I don’t know about you, but if that’s the link I saw, there’s a good chance I may not click it, whereas a more attractive affiliate link is much more likely to get my click.
It’s these links that we’re going to use to monetize our blog.
The reason we want an easy way to manage them is because sometimes you need to change your affiliate links. For example, let’s say one of your recommendations changes, which would you prefer; to go through all your existing blog posts, find each link to that product recommendation and change it, or go to the place where you manage all your affiliate links, change that one link and have it automatically update each reference to that link on all pages of your blog?
Exactly. And that’s the reason we installed and activated the Pretty Links plugin earlier in this tutorial and that’s where we’re going to head now.
In the left-hand menu of your WordPress Dashboard, locate Pretty Links and give it a click. The next screen you’ll see is the screen that lists all your affiliate links. As this is the first time here there aren’t any so let’s rectify that. Click on Add New Link. You can either do this at the top of the page or in the left-hand submenu.
On the next screen, you’ll see all the settings you have available to you when setting up a pretty link. So we’ll go ahead and select our redirection type. Enter our Target URL, which will be the affiliate link you’re supplied with. I’m just going to enter a dummy link for this demonstration. Give your pretty link and relevant name. Add a useful title and any notes that might come in handy and then give Advanced Options a click.
As this is an affiliate link, we’ll want to make sure that No Follow is ticked, and also that Tracking is ticked. That’s all the settings complete.
Finally, click Create to save your changes.
And there it is, our first affiliate link. So now you’ve got an affiliate link, you’ll want to put it onto a blog post. So that’s what I’ll show you next. How to create and publish a post in WordPress.
Now, before you publish any content, you need an idea of what to write about. This should be dictated by the needs of your audience. Who are they? What problems are they facing? What answers are they searching for?
Find the problems, supply the answers, and you should never have trouble getting traffic to your blog.
So, let’s get to it. In the left-hand menu of your WordPress Dashboard, locate Posts and give it a click. Next, either from the Posts submenu or at the top of the Post page, click on Add New and you should see a page like this. On this page, first, we’re going to head to the title area and give our blog post the title. And then we’ll want to add our post information into the content area.
Now on WordPress, we do this with blocks. To add the content block, you can click the plus to the left-hand side of the content, or locate the plus sign in the top left-hand corner of the Post page. Here you’ll see all the different types of content block available to you. The most used blocks, common blocks, formatting blocks, layout elements, widgets, embeds, and more.
For this demonstration, I’m going to add a classic block as it includes a lot of formatting options that come in handy all in one place.
I’ll then add in some sample text for the purposes of the demonstration. And then with this text, I’ll show you just how easy it is to make text bold, italic, and add in bullet points. As you can see, it’s really straightforward.
So next I’ll show you how to add media to your posts. But first, we’ll head up to the top right-hand corner of the page where you’ll see the publishing options, and we’ll click Save Draft. You’ll find this button comes in extremely handy, especially if you’re writing long posts.
Once the draft of your post is saved, we’ll head back to the Add Block section and locate and click the image block.
They don’t come much simpler than this block. It’s just a case of selecting your image from the relevant source and then adding it to your blog post. As we haven’t added any images to our WordPress Media library, I’m going to select Upload and then I’ll browse my PC for the image that I want to add. Once I’ve found it, I’ll select it, and as you’ll see, it now appears in the blog content, along with a few formatting options. These include things such as align left, align centre and align right.
In most cases, I prefer to align images to the centre, so that’s what I’ll do now. So that’s image is sorted.
Next, I’ll show you how to add videos into your post. As before, we’ll click to add a new content block, and then we’ll scroll down to Embeds where we’ll select YouTube.
Now, if you are adding a video that’s not from YouTube, you select the Embed block as opposed to the YouTube block. From here it’s as simple as heading to YouTube, locating the video that you want to add to your blog, copying the URL for that video, heading back to your blog, enter the URL into the YouTube block and then click Embed.
Alternatively, if you need to make use of the YouTube Embed options, you’ll need to add a custom HTML block, head back to YouTube, click on the Share option, which you’ll find just below the video, click Embed, set the options to your preference, and then once you’re happy, highlight and copy the entire Embed code.
Alternatively, you can click the copy option and it will do it for you and display the confirmation message ‘link copied to Clipboard’.
Once you’ve copied the Embed code, head back to your blog, put the cursor into the custom HTML block and then paste. You then have the option to click on the Preview tab and this will display what the video will look like within the post screen. And should you feel the need, you can also preview the video within this screen too.
Now, when you have a block selected within the Post editor, there are a number of options available to you in the right-hand menu. You’ll find these under the block tab and they are specific to the block that you have selected. Also in the right-hand menu, under the Document tab, you’ll find a list of options that apply to the post. This is where you can select things such as the category that the post applies to, add tags to the post and select the post’s featured image.
Underneath the post content, you’ll find the layout settings. These are fairly self-explanatory, and just below that, you’ll find the Yoast SEO settings for the post.
If you’ve jumped to this step in the tutorial. The reason the Yoast SEO settings are showing here is because they were added as a plugin earlier in the tutorial.
Within the Yoast SEO section, you can modify the settings for the search engines and the social media platforms.
This includes things such as the post title, the post slug, and the post method description. When you edit these sections, the plugin provides a preview so you can see exactly what a visitor would see should your post show up within the search engines. You can also select whether the post should show up in the search engine results. For example, if you were creating something basic, such as a thank you page, there would be no need for the search engines to display this.
So now we’re done with this post, we’ll head back up to the top right-hand corner and click the Save Draft button. And then once that’s saved, we’re going to click Preview to view the post.
At this point, you’d now check your post for any mistakes or formatting issues. If you find any, you’d then head back to the post and edit this. And then once you’re happy that the post is correct, we head back to the top right and click the Publish button. This will reveal a few publishing options.
These include things such as the post visibility, where you can select if the post is public, private or password-protected, and you can select whether to publish the post immediately or at a date in the future.
For this demonstration, I’m going to publish it now, so I’ll click the Publish button and as you can see it’s telling me that the demonstration post is now live. So let’s click the View Post button and go see what it looks like.
So here’s our demo post, which, as you can see, contains text, images and video.
You’ll also see that I’ve selected the layout that includes a right-hand sidebar.
This is a fairly popular layout, so in the next step, I’m going to show you how to customise this sidebar. So we’ll head back to our WordPress dashboard and in the left-hand menu, we’ll locate Appearance and then click on Widgets.
The next screen you see will be the WordPress Widgets page. This displays all the available widgets on the left-hand side of the page and on the right-hand side of the page, you’ll see all the available widgets areas that you can use within your theme.
These widgets areas refer to all the different locations you can apply a widget within your theme, such as your Homepage, the Sidebar, and so on.
To create or customise a widget for your blog, it’s as simple as selecting the area where you want the widget to apply, expanding that widget area and then dragging the types of widgets that you want to appear across into that widget area.
For this demonstration, I’m going to show you how to customise the primary sidebar for the blog. As you can see, there’s already some items within the primary sidebar widget area, and there’s a number of these I don’t want showing. So I’ll take this opportunity to show you how to delete widgets from a widget area.
You simply expand the widget that you no longer want. And then in the bottom left-hand corner of that widget, you should see the Delete button. Then it’s as simple as clicking Delete.
And now I want to add a custom HTML widget to the primary sidebar area, so I’ll locate that on the left-hand side. Click and hold on it and then drag it across and drop it within the primary sidebar area where I’d like it to appear.
I’ll then give it a title. It’s actually going to be using the next step, so I’ll label it that way, and then once that’s done, we’ll click the Save button.
Now that’s saved, we’ll head over to the blog so you can see what it currently looks like. And there you go. There’s our primary sidebar with the custom HTML widget that we’ve just added.
In the final steps of this tutorial, we’re going to change that HTML widget so that it shows an email opt-in form to allow you to collect email addresses directly from your blog.
To do that, we’re going to need an email marketing service provider.
If you’re thinking of skipping this step, I highly recommend that you reconsider.
The reason for this is that I believe building an email list is a vital step for your blog’s success.
By capturing your visitors’ email address and building an email list, it gives you the ability to communicate with your audience on a more personal level.
It can also be an extremely valuable traffic source.
Just think you could send an email and have almost instant traffic to your blog post or offer.
Having direct access to someone’s inbox also increases the chance that people will see your message. As you know, it’s quite easy to miss things on social media, and you can’t guarantee people will constantly check your blog. But most people regularly monitor their email, so it’s ideal to have their email address.
Now, unless you’re new to internet marketing, you’ve probably heard the phrase ‘the money is in the list’.
Now that is pretty much true. You’ve just got to remember one thing;
You have to treat the people on your list with respect.
Do not abuse their email inboxes. Always provide them with value and don’t just send money-making offer after offer.
The more value that you provide, the more trust you’ll build with your audience and the more you trust someone, the more likely you are to listen to their recommendations and make a purchase.
So please don’t make the huge mistake and ignore email marketing for your business.
If you’re not sure how you’d use it in the beginning, you could simply offer an email newsletter.
So now you know the importance of building an email list, we’ll get back to the tutorial.
Now at this point, you’ll need to choose an email marketing service provider. My recommendations are listed on the blog posts that accompanies this video.
The blog post also includes step by step instructions on how to set up my number one recommendation.
If you plan to utilise email marketing in your business, which you should, head over to the blog post now and then come back to this video once you’ve completed the email marketing set-up steps.
Welcome back.
Assuming you followed the steps in the blog tutorial, you should now have an email account that’s set up with an opt-in form and a series of welcome emails ready to send.
Next, you need to head back over to your WordPress blog and in the left-hand menu, highlight appearance, and then click Widgets from within its sub-menu.
On the Widgets page, head back to the Primary Sidebar widget and then locate the Custom HTML widget that we created earlier. Click the little arrow to expand the Custom HTML widget and then paste your code into the field and finally click the Save button.
All that’s left to do now is to head over to our blog and we should be able to see the form that we’ve just added. It’s highly likely that your form will look much nicer than mine because I’ve just picked the default design for demonstration purposes.
At this point, it’s good practice to test your opt-in form with your own email address. This way you can witness your subscribers experience and make any necessary changes before anyone signs up.
If you want to get a bit fancier when it comes to collecting email addresses, you can also integrate your campaign with lead capture apps. These allow you to build your email list with techniques such as pop-ups, slide-ins, sticky ribbons, locked content, and more.
If you’re interested in doing this on your website, check out the Social Sharing and List Building section of my Resource page. I keep it up to date, so it always lists my latest recommendations.
And that’s it you’re done.
Your website now has an opt-in lead generation form to collect your visitor’s email addresses, and it will automatically send out an email campaign when a visitor submits the form.
Nice one. You can now start to build your very own email list and remember, use the list wisely and the larger it grows, the more success you should have, and that brings me to one last thing…
The next steps that I recommend you take.
Hopefully, you’ve followed this tutorial, taken action and now you’ve got your own website.
It’s secure. It’s got a regular backup. The SEO basics are in place. You can view Google Analytics data to help you grow. You’ve got a contact form. Social sharing to help spread the word. You can collect email addresses for your visitors, sorry, of your visitors because “the money is in the list”, and you know how to add an affiliate link so you can make money with your website.
So if this tutorial has helped you, what I’d like you to do next is sign up for my free email course that will guide you through laying down the foundations for your website, taking it to the next level and helping you transform it into a successful blog.
With this free course, you’ll learn;
The types of blog posts that have proven to attract traffic to your blog. How to Create Professional Logo. The key pages that every website should have, including one that has loads of potential to make you some, if not a lot of money. How to generate email subscribers and much more.
Once you’ve signed up, all you have to do is complete the task in the weekly email that I’ll send to you.
I’ve tried to make each task as easy as possible for you by breaking it down into step by step instructions.
Once you’ve completed all the tasks, your blog will be in a much better position to start making money online.
To sign up for the free course all you have to do is click the link below the video and enter your email address where you’d like me to send the course.
There might even be a surprise email or two and some freebies.
Now, if you’ve got any questions that relate to the video, please leave them in the comments section below this video or better still, in the comments section for the blog post that goes with this video.
Thank you so much for watching. I hope you enjoyed the video. I know it was long, but hopefully, you found it helpful. If you did enjoy it, please hit the like button, share it with some friends, subscribe if you aren’t already and check out the other videos on the channel.
Oh, and please let me know how you get on. It’d be great to hear from you and I’d love you to become my next success story.
Now go on, go take action.
Resources In The Video Tutorial
- WordPress Hosting: BlueHost
- Recommended WordPress Themes
- Free Guide: Affiliate Marketing – The Right Way
- Recommended Email Marketing Services
- Recommended Social Sharing & List Building Tools
- Free Email Course: How To Start a Blog – The Right Way
If you found this video useful, please share the link with others you think may benefit.
https://staging.internethabits.com/how-to-start-a-blog/#video-tutorial
How To Start A Blog: Step-By-Step Guide
To begin with, I’ll list the sections of the tutorial so you can easily jump to the part you need:
- What You’ll Need To Start A Blog
- How To Set Up A Domain Name And Hosting
- How To Install WordPress
- How To Set Up WordPress
- How To Install WordPress Plugins
- How To Configure Plugins
- Blog SEO (Search Engine Optimisation)
- Blog Security
- How To Backup Your Blog
- How To Add A Contact Form
- How To Set Up Google Analytics for WordPress
- How To Set Up Social Sharing
- Blog Design: Choose A WordPress Theme
- Blog Design: How To Install A WordPress Theme
- How To Add Affiliate Links
- How To Create Content And Publish Posts
- How To Add Images To Your WordPress Blog
- How To Add Video To Your WordPress Blog
- How To Set Up A WordPress Side Bar
- How To Start An Email List
- How To Choose An Email Marketing Service
- How To Set Up An Email Autoresponder
- How To Add an Email Subscription Opt-in Form
Step 1: What You’ll Need To Start A Blog
To set up your self-hosted WordPress blog, you will need:
- Domain Name
- Hosting Account
- Credit Card
- Autoresponder Account (optional)
- Premium Theme (optional)
You will get a domain name for free if you buy hosting from the service provider(s) I recommend in Step 2.
It’s always nice to save money, right?
Don’t worry if you already own a domain name, I also cover how to link this to your hosting account in the next step.
Step 2: How To Set Up A Domain Name And Hosting
Hosting is a server where your blog is stored and kept online so that visitors can see it on the internet. You own it, but you pay a small fee for the service. Think of it as renting a space on the internet to display your blog.
This is where you will install WordPress and manage your blog. Don’t worry, it’s a simple process.
There are many hosting companies you could choose from. Based on my research and experience, I recommend Bluehost or SiteGround.
They’re ideal when you’re just starting out. You can switch to a more expensive, managed web host once your website has a large audience and performance becomes an issue on overcrowded shared servers. But until then, save your money.
If you’re the type of person that prefers to start with the best and has a healthy budget, my latest hosting recommendations will come in handy.
I use Bluehost myself and if that’s not a good enough testimonial, then how about this? They’ve been a recommended hosting service by WordPress themselves for as far back as I can remember.
WordPress also recommend SiteGround.
Note: At the time of writing, SiteGround offers better technology.
I believe Bluehost and SiteGround are the best choices for people that want to start a blog. They provide everything you need from a good web host.
They offer excellent 24/7 Customer Support via phone, email, or live chat. They have a reliable uptime, great affordable rates, and they’re extremely easy to use. Plus, if you take the time to read their Terms of Service, you’ll see they’re companies with good values too.
Both offer excellent money-back guarantees. You’ll get a full refund if you cancel within 30 days.
The instructions I provide in this tutorial will refer to BlueHost’s hosting service. This is because I currently have websites hosted by this company. Don’t worry if you choose SiteGround or another hosting service though. You will still be able to follow along as the steps will be similar for whichever host you choose.
Here’s where the action steps begin:
Click here to go to the Bluehost homepage and click the button labelled Get Started. (They occasionally change the name of this button, but it’ll still be obvious what to click.)
The next step will be to decide which plan you’d like. I’d suggest the Plus Plan or the Choice Plus Plan as they have no website or storage limits, unlike the Basic Plan. If you’d prefer the cheaper plan, that will be just fine for starters.
Regardless of the plan you choose, the following steps will remain the same.
Click Select on the plan you’ve chosen to continue to the next stage.
At this point, you need to choose a domain name for your website. I will assume that you haven’t already registered your domain.
If you do already own a domain name, you can enter it here and click next to continue with your registration. (I will include instructions for transferring your domain registration or pointing your name servers to your host at the end of this step.)
How To Choose A Domain Name For Your Blog
The domain name of this blog is InternetHabits.com. Choosing a domain name can be difficult. I’d recommend that you either choose your name (this is the easy option if it’s not already taken) or a branded domain name like I have.
When choosing your domain name, consider:
- Is it easy to say and spell? This includes your name, use a shortened version is necessary
- Don’t use hyphens (e.g. Internet-Habits.com). Domain names with hyphens are harder to remember. Plus, you’ll likely find it annoying when having to tell somebody your website address
- Don’t use numbers. You don’t want to explain that you mean “6”, not “six” when telling somebody your website name
- Keep it simple. Don’t use words that you can spell in different ways (e.g. “two, to, too, 2”, “for, four, fore, 4” etc.)
- Keep it short so it’s easier to remember
- Include keywords for your blog’s topic in the domain name (e.g. “Bluehost.com”, “DailyBlogTips.com” etc.). This will give readers an idea of what they’re likely to expect
A domain name is a very important part of your blog and is essential for branding. Take your time here and choose wisely.
Try the tool below and see if the domain name you want is available. If it’s unavailable, you’ll get some relevant suggestions.
Once you have decided on some ideas for your domain name, enter your favourite in the left-hand box “create a new domain” and click the Next button. If I were you, I’d try to stick with .com as it’s the most popular domain extension.
Disclosure: I use NameCheap to register my domains because they provide free “WhoIs” protection and redirecting the name servers is nice and straightforward. Stick to using the free domain in this case though.
Once you have entered a domain that is available, you must then fill in your account details and select the length of your account plan. In general, the longer term you buy, the lower the monthly rate will be.
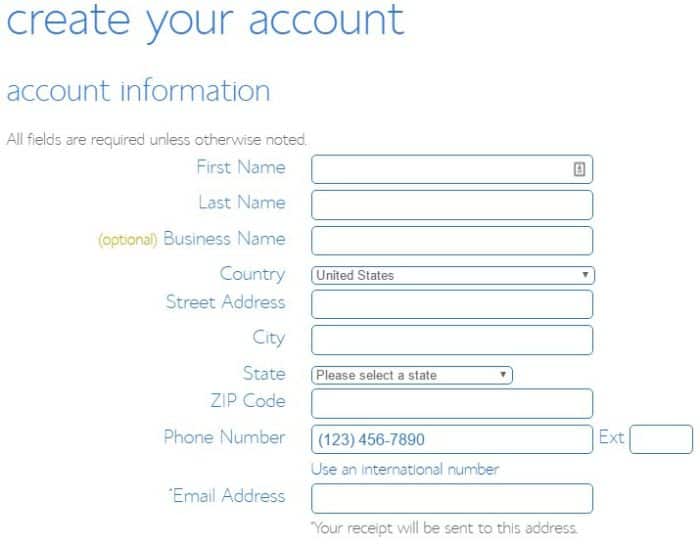
Signing up for the extra services is up to you. I wouldn’t bother with any of these. In my opinion, the best extra is already included for free; Domain Privacy + Protection. This shields your personal details from being on display to the public.

Now enter your billing information. Once that’s done, confirm that you have read and agree to the Terms of Service, etc., and click the Submit button.

Once your payment information has been verified, skip any upgrade offers (unless you want them) and complete your account sign up. This step may take a minute or two whilst your domain is registered.
You should now be presented with a Welcome page. At this stage, you will need to create a password for your account. I recommend using the Password Generator to create a strong and secure password. It will be difficult to hack.

Make sure you store your password and other account details somewhere safe. You’ll need these to access your blog and if you need to contact support.
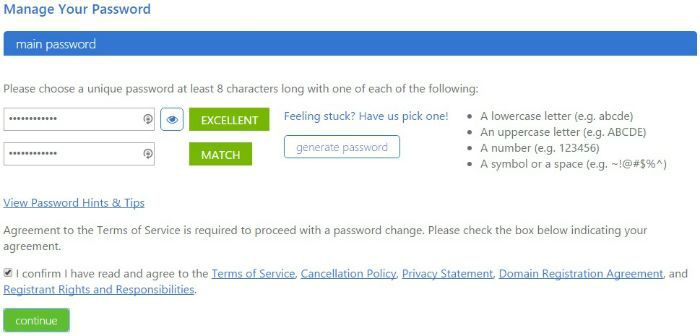
Confirm your password and finish the process to create your new Bluehost account.
If you registered a new domain, continue on to Step 3.
Optional: If You Already Have A Registered Domain
If you have your domain registered with another domain registrar, you need to link it to your hosting account. If you miss this step, your website will not be visible online.
You can either:
- Transfer your domain registration to your hosting company
- Change the Name Servers for your domain to point to your host
I recommend changing the name servers because it’s a much simpler process.
This video will walk you through how to change your Name Servers:

Pressing play on the video(s) will set a third-party cookie. Please read our cookie policy for more information.
The above example shows you how to change them at NameCheap. It will be a very similar process no matter who your domain registrar is. Bluehost explains here.
Once you have changed the name servers for the domain, create an Addon Domain in your hosting account. The following tutorial will guide you through the simple process: Bluehost: How To Add a Domain to Your Account
If you’d prefer to transfer your domain registration to Bluehost, please watch the following video tutorial:

Pressing play on the video(s) will set a third-party cookie. Please read our cookie policy for more information.
Please note: These transfer processes can take up to 48 hours to take effect. If you experience any problems following either of these procedures, please contact your Registrar for support.
Once your domain is with Bluehost, you can move on to the next step.
Step 3: How To Install WordPress
At this point in the tutorial, you should now be at the Bluehost login screen.
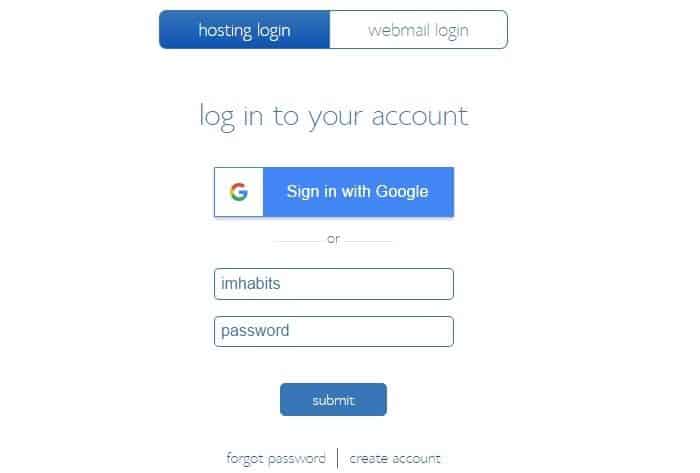
Go ahead and log in to your account.
You will now install WordPress, your blogging software. WordPress is a free and open-source content management system (CMS).
Once you’re logged in:
- Click on the Hosting link near the upper left corner
- You should now be at the Control Panel or cPanel
- Scroll down to the Website section
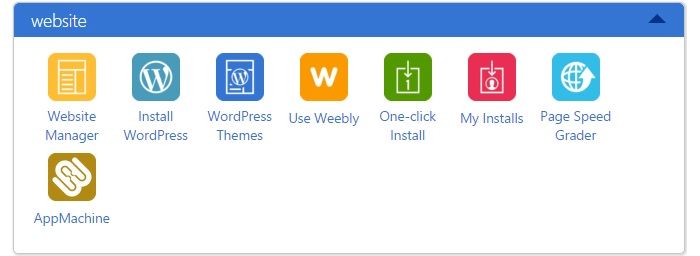
- Click on the Install WordPress logo
- The next screen you see should be about WordPress
- Click on the Install button
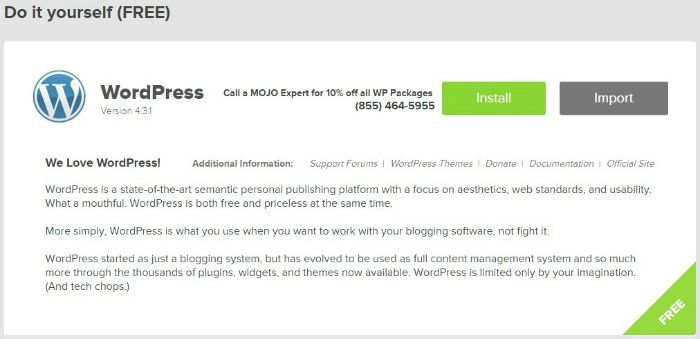
- Next, select the domain you want to install WordPress on (it should default to the correct one)
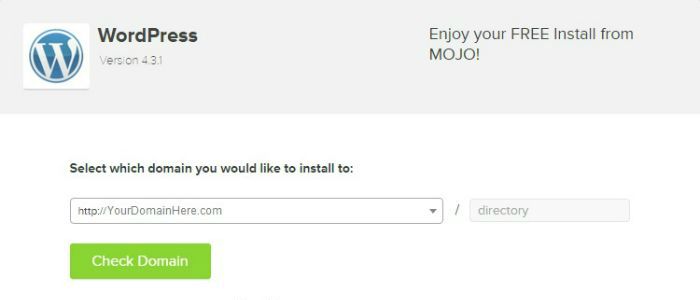
- Click on Check Domain
- On the next screen, click on Advanced Options
- Enter your site name (for me that would be Internet Habits)
- Enter a Username and Password (or accept those suggested by Bluehost)
- Save this information somewhere safe. You will need it to log in to your blog
- Tick “I have read the terms and conditions of the GPLv2”

- Click on the Install Now button
Bluehost will now install WordPress for you and let you know once it’s complete.

Once your install is complete, click on the View Credentials button (You may have to click View once more).
You should be presented with your Blog and Admin (Login) URLs. You should also receive this information in an email from Bluehost.
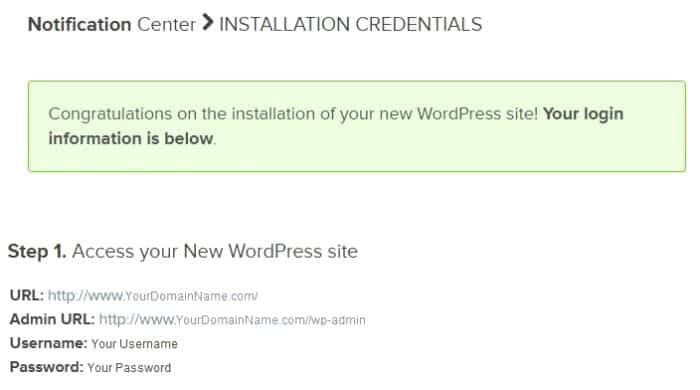
Click on your Admin URL link. Your WordPress login page should open for you.
Enter your Username and Password and click the Log In button.
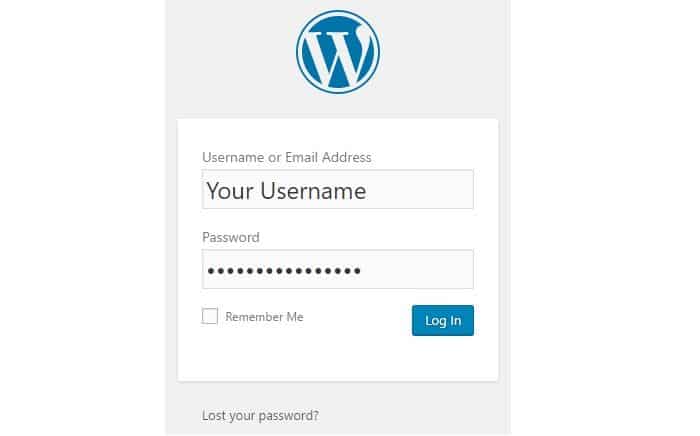
You will now see your WordPress Dashboard. This is where you set up everything for your blog, how it will look, your content, etc.
Well Done! You Have A Self-Hosted WordPress Blog
That’s the most difficult part of this entire process complete. Congrats! Told you it was easy, didn’t I?
You now have your very own self-hosted WordPress Blog!
Tell your friends about your achievement:
In the next steps, I will help you make your blog:
- User-friendly
- Look good
- Search engine optimised
- Setup for social sharing
- Safe and secure
- Able to capture email addresses (this bit is extremely important)
I’ll even show you how to add affiliate links to your blog so you can make money blogging!
Let’s get started…
Step 4: How To Set Up WordPress
When viewing your WordPress Dashboard for the first time, you’ll want to click on the Settings option located in the left-hand menu. This will display a few sub-menus. Take time to work through these. The majority are personal preferences so I can’t guide you through this bit.
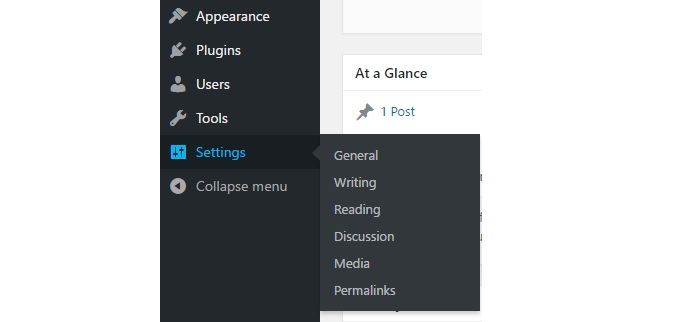
However, there’s one sub-menu I will help you with:
Permalinks
A permalink is a link that leads to a page or post on your blog. The default permalink on WordPress is your domain name followed by your post ID:

It doesn’t help anyone understand what the page or post is about. Let’s fix that.
I recommend using a simple and clear permalink structure. The easiest way to do this is to end your URL with the post name. You could also include the category prefix before the post name.
To set your permalink structure to include your post name, on the Permalink Settings page, select the Post name option and click Save Changes.
To include the category prefix in your permalink structure:
Once on the Permalink Settings page, select the Custom Structure option, and enter: /%category%/%postname%/

Click the Save Changes button.
This will make sure that the links to your posts and pages read nicely and don’t contain a load of random letters and numbers.
Step 5: How To Install WordPress Plugins
What are WordPress Plugins?
WordPress Plugins are software that you can upload to increase the functionality and features of WordPress. They are one of the key benefits of building a website with WordPress.
Click on the Plugins option in the left-hand menu of your WordPress Dashboard and then click on Add New.

From this screen you have 2 options:
- Search for a Plugin and click on the Install Now button
- Click on the Upload Plugin button and browse to a plugin you have downloaded to your computer
To keep this tutorial as simple as possible, we will use option 1. This will allow you to stay inside your WordPress Dashboard.

Search for and install the following plugins:
- Yoast SEO
- iThemes Security (formerly Better WP Security)
- UpdraftPlus WordPress Backup Plugin
- Contact Form 7
- Google Analytics Dashboard Plugin for WordPress by MonsterInsights
- WordPress Share Buttons, Related Posts, Google Analytics – Shareaholic
- Pretty Links – Link Management, Branding, Tracking & Sharing Plugin
Once they are installed, go to the Plugins screen again on your WordPress Dashboard. You should now see a list of all your installed plugins.
Underneath the name of each plugin, you will have the option to Activate. Click this for each of the plugins you installed (or, tick the box next to each of these plugins and from the “Bulk Actions” drop-down menu, select Activate and click the Apply button).
You can see the other plugins and tools I use on the Resources page.
Step 6: How To Configure Plugins
Once your plugins are active, you will need to configure the settings for each of them.
Like almost everything in WordPress, you do this by selecting what you need from the left-hand menu in the WordPress Dashboard.
When plugins are active, they appear in the left-hand menu in 1 of 2 places:
- As a new option
- As a new option located under the Settings sub-menu
Step 7: Blog SEO (Search Engine Optimisation)
We’ll start by configuring Yoast SEO to optimise your blog for the search engines. Doing so will give your website a better chance of ranking in the search engines. This can lead to “free” organic traffic to your blog.
Click on SEO in the left-hand menu of your WordPress Dashboard. This will display the plugins General Settings page.
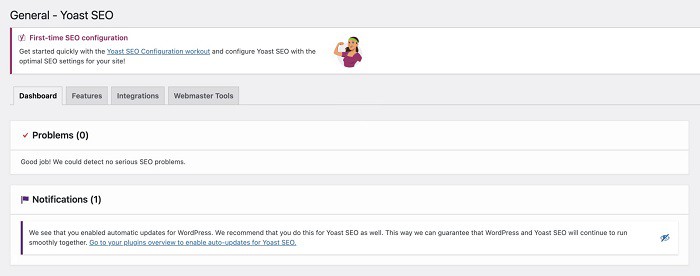
If it’s the first time you’ve installed the Yoast SEO plugin, on this page you should see a link for the Yoast SEO Configuration workout. Alternatively, you’ll find a link to Workouts available in the SEO submenu.
To configure this plugin, click on the link for the Yoast SEO Configuration workout or click on Start workout! for the “Configure Yoast SEO with the optimal SEO settings for your site” option within the Workouts screen.
Complete each section of the workout, clicking Save and continue once you’ve completed each section, and finally, once all of the sections are complete, click the Finish this workout button. This will help to configure your SEO settings to match your websites needs.
Once the workout is complete, move on to securing your website.
Step 8: Blog Security
To have your site hacked and all your hard work tampered with is something that everyone wants to avoid. So in this next step, I will tell you how to boost your blog’s security.
Click on Security in the left-hand menu of your WordPress Dashboard. This will display the iThemes Security – configuration wizard.
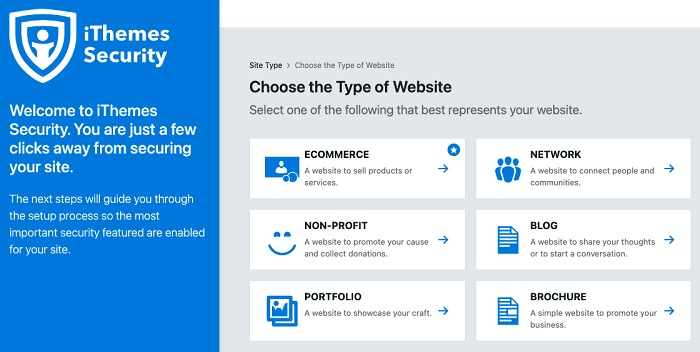
On this page, follow the on-screen prompts until you have completed the wizard for the type of website you plan to create. This will make sure that your website is using the recommended settings.
If you want your website’s security to be even more robust, check out my website security recommendations. I’ve not included them in this tutorial because there’s a cost involved with some of them.
Once that’s complete, work your way through the remaining sections to improve your blog’s security.
Step 9: How To Backup Your Blog
Now you’ve increased the security of your blog, the next step is to make sure that your site has a backup. That way if something goes wrong, you can restore it to when it was in good shape.
Click on Settings >> UpdraftPlus Backups in the left-hand menu of your WordPress Dashboard. This will display the UpdraftPlus Backup Dashboard.
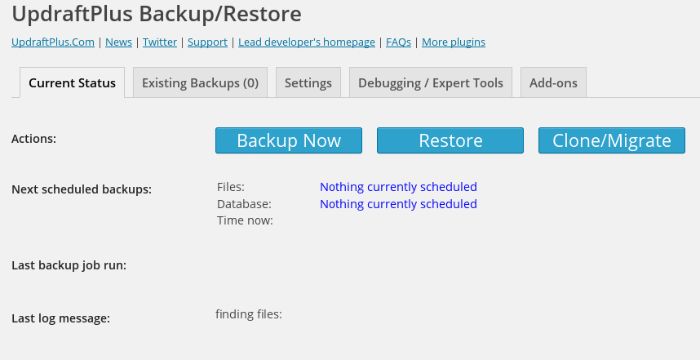
Next, click on the Settings tab and go through the options selecting what suits you best. For example, you might want your backups sent via email and/or to your Dropbox or Google Drive account.
Please note that additional options will appear depending on the choices you make for remote storage.
Remember to click the Save Changes button once you’re done.
You now have an automated backup of your blog.
You can check out my website backup recommendations if you feel you need a more advanced solution that puts less strain on your hosting resources.
Step 10: How To Add A Contact Form
Click on Contact in the left-hand menu of your WordPress Dashboard. This will display the main page for Contact Form 7.
Here you will see links to instructions for how to use this plugin. You’ll also see an existing contact form that’s set up by default.
Click on this contact form to view the Edit Contact Form screen. Make any changes you would like and then click the Save button. Don’t forget to complete the options in each tab.
Copy the code supplied for this contact form. It’ll be something like this:
Now you have a contact form, you’ll need a page to put it on so that your visitors can see it.
Creating a Contact Page
To create a new page in WordPress:
Click on Pages in the left-hand menu of your WordPress Dashboard. This will display a list of your blogs Pages.

Click on the Add New button then give the page a name (i.e. Contact, Contact Me, Contact Us, etc.).
The following step is to write something in the content box. Write what you’d like your visitors to read before they fill out your contact form. You can view my contact page if you’d like some ideas.
You then simply need to paste the code you copied earlier in this step into the content box as seen in the image below:
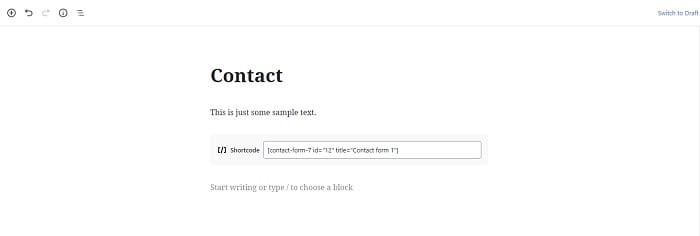
Finally, you must scroll down the page and fill in the SEO section (Title, Meta description, etc.). Once you’ve completed that, click on the Publish button.
Your blog now has a contact page that your readers can use to get in touch.
If you feel you need a more advanced form solution for your blog, you’ll find my latest recommendations in the WordPress Plugins section of my Resources page.
Step 11: How To Set Up Google Analytics for WordPress
Google Analytics is a free service that tracks and reports on website traffic to gain visitor insight. You can use the data to help grow your blog so it’s a good idea to have it set up from the start.
Click on Insights in the left-hand menu of your WordPress Dashboard. This will display the Google Analytics MonsterInsights Dashboard.
From here, click on Settings. This should have appeared in the left-hand menu of your WordPress Dashboard as a sub-menu option under Insights.

Once on the MonsterInsights Settings page, you must link it to your Google account. Click on the Connect MonsterInsights button and complete the process.
Once that’s done, click the Launch Setup Wizard button and complete all the steps.
You’ll now be able to access all the Google Analytics stats for your website. These stats include details such as:
- The number of visitors your site has received
- How long your visitors stay on your site
- Your most popular content
It comes in extremely handy!
Step 12: How To Set Up Social Sharing
Social sharing is when content from a website is shared on a social media site.
Why should this be important to you?
Because it can increase the number of visitors to your blog (also known as website traffic).
You can enable social sharing on your site by strategically placing social sharing icons on your posts and pages. You do this to make it easy and to encourage your website visitors to share your content with their friends, etc.
There are several ways you can set this up on your blog. I will guide you through one of the more popular options.

Click on Shareaholic in the left-hand menu of your WordPress Dashboard. This will display the Shareaholic – Site Apps screen.
Optional: Sign up for a free account with Shareaholic to get access to more features in the plugin.
Tick each of the options that you’d like to apply to your blog.
For each option that you tick, click the Settings button and complete the settings that pop up in a new window.
I suggest adding Twitter and Facebook as a bare minimum.
Once that’s done, click the Settings option from within the Shareaholic Site Settings menu and work through each of the tabs until each section is complete.
Don’t forget to click Save Settings each time you complete a section.
If you want more advanced features from a lightweight plugin that has less impact on your page load speeds, check out my recommended social sharing plugins. I’ve not included them in this tutorial because there’s a cost involved with some of them.
Look The Part And Make Some Money
At this point in the tutorial, your blog is in a good place. It’s optimised for the search engines, secure, has an automated backup, it’s set up so your visitors can contact you, has Google Analytics enabled, and its content is set up for sharing to encourage growth!
But there’s still plenty more that you can do to improve your blog even further…
The next steps in the setup process are arguably the most fun!
If you take a look at your blog at this stage, you’ll see that it looks very basic.
You’re about to change that…
In the final steps of this blog setup guide, you will:
- Choose your blog’s design
- Add links to help you make some money
- Create forms so you can capture your visitor’s email addresses (hint: this is crucial if you plan to use your site for business reasons)
Step 13: Blog Design: Choose A WordPress Theme
It’s time to choose your theme. Your theme is the design of your blog.
At the moment your blog will look something like this:
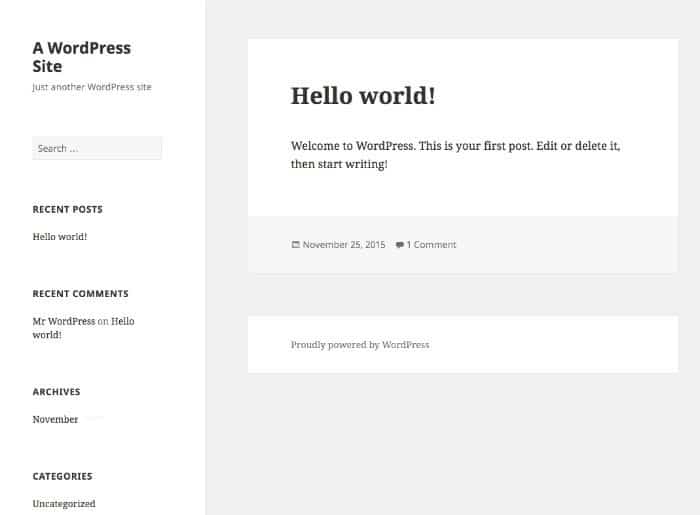
A little plain, right?
There are literally thousands of themes to choose from. You can pick them up for free or spend a few hundred dollars.
WordPress themes are a great example of the cliche: “You get what you pay for”.
Investing in a good theme now can save you time, hassle, and additional expense further down the line.
Take some time to choose a theme that has the features you’d like on your website (my recommendations are listed below). But do not waste time trying to perfect your blog design.
I understand you want your website to look and respond a certain way. But now is not the time to worry about this.
You need to focus on creating your content and promoting your website. What use is a perfectly designed blog if no one sees it?
Believe me, I’ve been there myself. Please learn from my mistake, pick a solid framework and move on.
Remember, there’s nothing stopping you from coming back and tweaking your design at a later stage.
WordPress Themes: What To Look For
When choosing your theme, you should consider:
- Clean code: Themes that aren’t coded well will make your site speed suffer. This will affect your search engine ranking
- Latest code standards: This will make your site compatible with future changes to the Internet. It will also make sure it’s cross-browser compatible
- Mobile friendly and responsive: If your site isn’t mobile responsive then this can affect your search engine ranking. More importantly, more and more people are using phones and tablets to browse the Internet. You’d be making a huge mistake not to account for them with your theme
- Secure: As I mentioned earlier, you don’t want someone to hack your site. The more you do to prevent this, the better. Choose a theme that is coded to make sure it’s secure
- Updates: Being able to update WordPress and your theme to the latest secure version is vital
- Support: If you encounter a problem with your theme, it’s always nice to know you have support available to help you to solve the issue
- Community: If numerous people use the themes, you can bet there’s a strong community you can turn to for support
When making your choice, you have the following options:
- A Free Theme: Please don’t waste your time with a free theme. When you want to tweak the design, it’ll likely be more trouble than it’s worth. The money spent on a premium theme will easily cover the cost of all the time you’d waste modifying a free theme. Plus, the majority are outdated, no longer updated and lack support
- A Premium Theme: The price of a premium theme is well worth it. These themes are much easier to modify. The majority include the list of features I mentioned above. Plus, they’re just a fraction of the cost of a custom theme
- A Custom Theme: If you have a big budget and know exactly what you want, you could hire a developer to design you a unique custom theme. But for most people, a premium theme will suffice
As you may have guessed, my recommendation is to get yourself a premium theme. I suggest you consider one of these:
- StudioPress: Used by many professional bloggers, StudioPress themes are powered by the Genesis Framework. This has you covered for all the features I recommend in a theme. Plus, because StudioPress themes run on a framework and child theme combination, it helps to future proof your blog. It also makes modifications much easier. Internet Habits uses their Genesis Framework and Generate Pro child theme (although I’ve modified it quite a bit!)
- GeneratePress: This lightweight theme has been developed with an emphasis on performance. If you want a fast and secure theme that’s search engine optimized, take a look at GeneratePress
- Thrive Theme Builder: Thrive Theme Builder and its conversion-focused companion theme, Shapeshift come bundled with access to Thrive Architect Light (page builder). If you’re looking for a theme that’s easy to modify, check out their selection. I’ve used their themes for other projects and use several of their plugins on this website. You can get access as part of Thrive Suite
- Elegant Themes: This involves paying an annual fee (unless you buy the lifetime access) but it gives you access to all their professional themes, including the extremely popular Divi. This makes it a great bargain
If I was starting a new blog today, I’d likely choose a theme from StudioPress, GeneratePress or the all-in-one option, Divi from Elegant Themes.
Step 14: Blog Design: How To Install A WordPress Theme
Once you have purchased your theme, browse to Appearance and then Themes. You will locate this in the left-hand menu of your WordPress Dashboard.
You’ll now be presented with the WordPress Themes page. Click on the Upload button and then on the next page click on the Upload Theme button.

Now click on Choose file and browse to the location on your computer where you saved your theme. Select the .zip file of the theme you purchased and click the Install Now button.
Finally, Activate your theme from the WordPress Themes page.
Configure Your WordPress Theme
The last step is to configure your themes settings (colour, layout, background etc.). You should be able to find instructions on how to do this from the company/developer that you purchased your theme.
All my theme recommendations above offer this information via guides and/or video tutorials.
You’re now ready to add content to your blog.
Step 15: How To Add Affiliate Links
Before I tell you how to create and publish posts on your blog, I will show you how to create masked affiliate links. You can use these links to monetise your site when crafting your content.
Click on Pretty Links located in the left-hand menu of your WordPress Dashboard. This will load the Pretty Links plugin page.
I use the Pro version of ThirstyAffiliates to create and manage the affiliate links on Internet Habits. Pretty Links also have a Pro version.
The Pretty Link plugin allows you to create shortlinks using your own domain. Shortlinks are simply an alternative URL that redirects visitors to the desired URL.
Why not just use the desired URL?
Well for starters, shortlinks are neat and tidy and are much more likely to get a click from your visitors. This is especially important for affiliate links. More clicks can mean more money for you.
Here’s an example of a typical affiliate link:
- http://www.shareasale.com/r.cfm?B=12345&U=6789&M=54321&afftrack=123ABC
Here’s the same affiliate link made into a shortlink:
- https://staging.internethabits.com/thesis
Which one of these would you rather display on your blog? Which one are you more likely to click? The shortened link, right?
Another benefit is the ease of management. Sometimes you might need to change your affiliate links. Would you rather change one link that updates every occurrence on your blog or manually change each occurrence?
Before we continue, I should point out that you must inform your blog visitors upfront that your site includes affiliate links. The Federal Trade Commission (FTC) enforces consumer protection laws and regulates commercial conduct in the offline and online marketplace.
The following links will give you an idea of what the FTC would consider fair and best practices for advertising online:
The FTC’s Endorsement Guides: What People Are Asking
.com Disclosures: How to Make Effective Disclosures in Digital Advertising
You will have seen that I adhere to these laws throughout this tutorial. I’d prefer not to get into any trouble and I don’t want you to either.
Right, let’s get back to creating your first affiliate link. Click on Add New Link in the Pretty Link submenu. This will display the Add Link screen.

The first thing you must do is choose your Redirection Type. There are two options:
- 307 (Temporary): The 307 redirect will tell the search engines that the link might change.
- 301 (Permanent): Use this option for permanent internal URL changes. This option can give your new URL an SEO boost by passing on “link juice”.
Next, enter your Target URL. This is where you enter your affiliate link. You can get an affiliate link by signing up to be an affiliate for the person/company whose product/service(s) you’d like to promote.
Now enter the relevant word(s) that you’d to appear as a link into the Pretty Link field (do not include any spaces between the words). For example, if you plan to recommend Bluehost hosting as I have, you could enter Bluehost or hosting here.
Give your link a Title that will make it obvious what the link is for and then move on to the Advanced Options.
Here you’ll want to make sure that Tracking is ticked. This will give you an idea of how well the link is performing.
Finally, you need to decide whether you want your link to be No Follow or Sponsored. Tick the Sponsored box if it’s an affiliate link. Leave the box blank if it’s a permanent redirect for an internal URL.
Click the Create button and you’re done.
Now, using my Bluehost link as an example, every time a user goes to internethabits.com/bluehost, the URL will redirect them to my affiliate link.
Step 16: How To Create Content And Publish Posts
Before creating any content, you need ideas of what to write about. The needs of your audience should dictate this:
- Who are they?
- What problems are they facing?
- What answers are they searching for?
Once you define your audience, you’ll have a much better idea of what to write.
Provide detailed answers to their questions; include helpful resources. Basically, write blog posts that offer solutions to your reader’s problems.
Now we’ve cleared that up, we can get onto creating a post for your blog.
In the left-hand menu of the WordPress Dashboard, click on Posts and then Add New. You should now see the Add New Post screen.

Give your post a title. To begin with, you could use something like “My Blogging Journey Starts Here” or “Welcome to My Blog”.
Highly imaginative, right?
Now write your first blog post in the block below the title. You’ll see that it’s a basic text editor with functions you’re probably used to such as:
- Bold and Italic Font
- Inserting a Link
- Aligning Your Text
You can include different content within your post by adding another block.
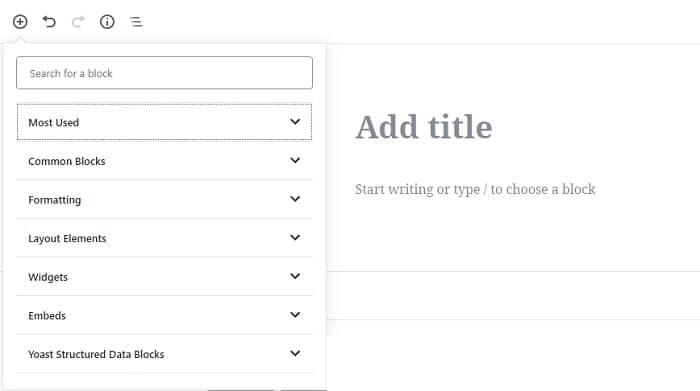
If you want more formatting options available, you could add the Classic block.

You might use your first post to introduce the blog, explaining why you’ve created it and what you plan to write about.
If you’re interested in my first post on this blog, it was about taking action.
Bear in mind that your first post doesn’t have to be perfect. Just get it out there. Almost everyone’s content improves over time and yours will too. Just get into the habit of regularly creating good quality content.
I recommend these books if you’re interested in improving your writing:
Accidental Genius by Mark Levy
This is a book all about freewriting. If you struggle with writer’s block, this book should help. There’s plenty of good ideas to get your creating again.
It’s an easy technique to get started with and your productivity will likely thank you for it.

Bird by Bird: Instructions on Writing and Life by Anne Lamott
This is one of the best books on the topic of writing that I’ve come across. It’s an enjoyable read that balances both humour and personal advice about the writing process. The book’s title comes from advice that the author’s father gave to her brother, who was struggling to write a report on birds, “Bird by bird, buddy. Just take it bird by bird.”

On Writing: A Memoir of the Craft by Stephen King
On Writing is both a textbook for writers and a memoir of Stephen’s life and will. If you’ve always wondered what led him to become a writer and how he became one of the bestselling authors of all time, this answers those questions. It’s a revealing and practical view of the writer’s craft, comprising the basic tools of the trade every writer must-have.

Once you’ve finished writing your post, if required, select a Category for it, add any Tags you’d like and then complete the Yoast SEO section. You will find this below the text editor field.
You now have 2 options:
- Click on the Publish button to make your post visible to the public
- Click on the Save Draft button if you plan to add to this post before it’s published
If you choose option 1, congratulations! You’ve just published your first blog post for the world to see. A link to View Post should appear at the top of the page. Click on it to view your first blog post live on your website.
If you choose option 2, the next few steps of this tutorial should come in handy (well… they should be handy no matter which option you choose).
Step 17: How To Add Images To Your WordPress Blog
To add images to your blog is straightforward. I’m going to run you through how to add an image to a WordPress post.
If you’re using the classic block, place the cursor at the position where you’d like to add your image.
Click on the Add Media button.
Browse to the image you’d like to add, select it and then click the Insert into post button.
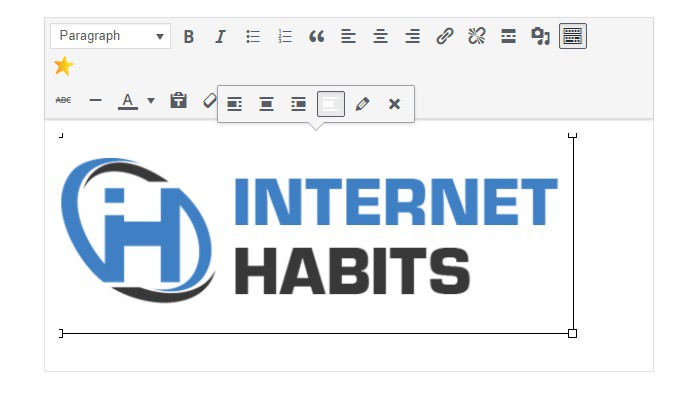
This will display the image within your post. All that’s left to do now is select its alignment. To do this, click on the image to make it active.
Once it’s active, WordPress will present a menu of options directly above the image. Set these options to your liking and you’re done.
Alternatively, you can use an Image block. This allows you to upload a new image, choose an existing image from your Media Library or insert an image from a URL.

If you need some help to find and create images for your blog, check out these image sources, apps and optimization tools.
Step 18: How To Add Video To Your WordPress Blog
Let’s say you’ve created a video and uploaded it to YouTube but you’d also like to display it within your blog post. Well, guess what?
It’s easy to do:
Go to YouTube and load the video that you’d like to add to your blog post. Click on Share which you’ll find just below the video.
This will display some options. Click on Embed and you’ll then see a link and a few options.
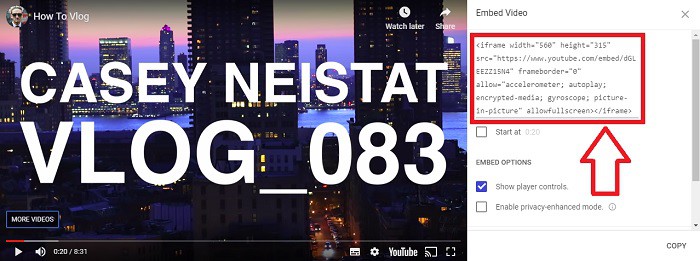
Set the options to your preference and then once you’re happy, highlight and copy the entire Embed code. Alternatively, you can click the COPY option and it will do it for you and display the confirmation message “Link copied to clipboard”.
Now you’ve copied the embed code, head back over to your blog post and add a Custom HTML block into your post where you’d like your video to appear. Now simply paste the embed code into the Custom HTML block.

If you don’t need to set any of the YouTube embed options and would be happy with their default settings, there is another option available to you.
Insert the YouTube embed block into your WordPress post and paste the video’s URL into the field provided. Once that’s done, click the Embed button. The video will then be displayed within your post editor.

That’s it. Now when you publish your blog post, you’ll have video within your content.
If you plan to create videos for your blog, my Resource page lists the video equipment and software I use and recommend, including my favourite tool for managing my YouTube channel.
Step 19: How To Set Up A WordPress Side Bar
This step will only apply to you if the theme that you have chosen has a sidebar included as part of its layout. The majority of popular blogs use a layout that comprises their main content with a sidebar on the right-hand side of their blog.
To add content to your sidebar, click on Appearance and then Widgets in the left-hand menu of your WordPress Dashboard. This will display the Widget page.
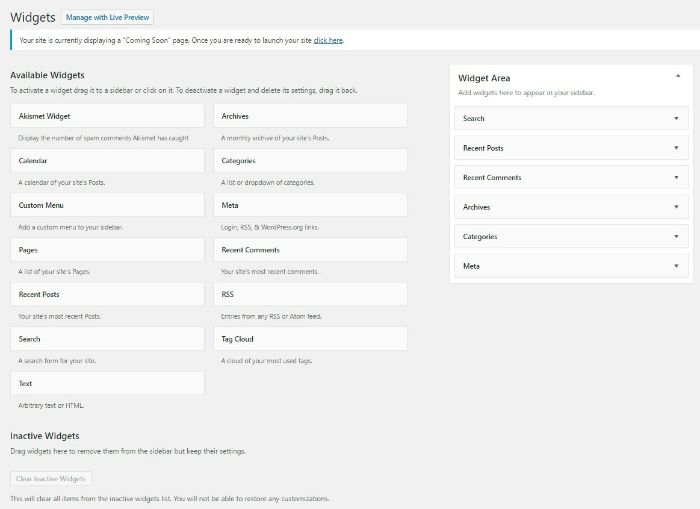
The left-hand side of the page displays the available widget types.
The right-hand side of the page displays the locations where you can place them on your blog.
From here it’s simply a drag-and-drop process. Drag the widget you want from the left-hand side of the page and drop it into the location section on the right-hand side.
Once you have it in place, you may have a few options to set depending on the widget you choose.
There are many different items you could display:
- Search Box
- Latest Posts
- Opt-in Forms
- etc.
Step 20: How To Start An Email List
Before you can add an email opt-in form to your blog, you need to sign up for an account with an email marketing service provider.
I’d say this step is almost vital to your blog’s success online. By capturing your visitor’s email addresses and building an email list, you give yourself the ability to communicate with your audience on a more personal level.
It’s the easiest way to engage with your audience and provides a valuable source of targeted traffic.
You’ll also increase the chances of your followers seeing your message. It’s easy to miss a post in your Facebook newsfeed, not visit a blog for a while, etc. But with email, you’re much more likely to see a message because it has been sent directly to you.
Oh, I should also mention that email marketing is where the money is. There’s a good chance you have heard the expression:
The Money is in the List
This is true!
If you treat the people on your email list with respect by making sure that your number one goal is to help them, then the money will follow.
However, if the focus of your emails is only to make money, you will lose credibility and your followers will look elsewhere for help.
Please don’t make a huge mistake and ignore email for your business. It’ll likely be a decision you’ll regret further down the line.
I recommend that you do yourself and your followers a favour by offering an email newsletter.
Step 21: How To Choose An Email Marketing Service
As with hosting, your email marketing service provider needs to be:
- Reliable
- Easy to use
- Offer good support
For these reasons, I recommend you take a look at one of the following services:

MailChimp: One of the most popular email services available. They’ve been in the business for a long time and offer very good customer support.
The application itself performs extremely well and they offer a good user interface. Though personally, I’m not a huge fan of this.
They also integrate with pretty much every marketing app/plugin available. This comes in very handy.
But there are a few negative points you should know. MailChimp is a little behind for automation. They also lack a tag-based service, opting to stick with an outdated list approach. Update: As of summer 2018, MailChimp has added the ability to tag your contacts.
To make matters worse, they count the same person (email address) on three different lists as three different people. This means that your subscriber count can increase faster. The larger your subscriber count, the sooner you’ll move up to the next price plan.
In other words, the outdated list approach could end up costing you more!
My other three recommendations all count a subscriber as a unique email stored in your account. This means you won’t get charged for duplicate subscribers. Plus, they all use the modern tag-based service. In my opinion, this makes them a better choice.
But…
MailChimp offers a Forever Free plan.
This makes them worth considering for beginners and those on a budget. If they didn’t offer this free plan, I wouldn’t have mentioned them. You’ll understand why when you read my other three recommendations.
The Forever Free plan allows you to have up to 2,000 subscribers and send up to 12,000 emails per month absolutely free. There’s no expiring trial, contract, or credit card required.
MailChimp is also fairly cheap once you upgrade to a paid plan, which unlocks additional features.
Not a bad choice for those just starting out. But there is better…
ConvertKit: It’ll cost you nothing to get started with ConvertKit because they offer a free plan.
With ConvertKit’s free plan you can manage up to 1,000 subscribers and it includes unlimited landing pages and forms. You’ll also be able to send unlimited email broadcasts each month.
Their free plan does not include automated funnels and email sequences, premium support or integrations. However, if you want access to these features ConvertKit offers a free trial.
If you like it, which I’m sure you will, at the end of your trial period ConvertKit will prompt you to add your payment details to your account. Don’t worry, they’ll also send you an email before your trial expires to remind you.
So why choose ConvertKit over MailChimp?
For starters, if marketing automation and visual workflows are important to you, there’s no comparison!
And when it comes to starting an email list, your focus should be to grow that list. If that goes to plan, your subscriber count won’t be low for long.
My point?
The free plan offered by MailChimp won’t serve you for long.
So if you’re tempted by MailChimp because of their limited free plan, I’d urge you to consider ConvertKit instead.
They will be slightly more expensive, to begin with, but you’ll reap the rewards, in the long run, thanks to their many superior features.
Once you’ve grown your list to a decent size, you’ll be glad you chose a modern email marketing service. A service that’s not apprehensive to change with the times.
More reasons to choose ConvertKit
ConvertKit is user-friendly and tailored for beginners. In fact, one of their taglines is:
The power of Infusionsoft, but easier to use than MailChimp.ConvertKit
Infusionsoft by Keap is a very powerful Customer Relationship Management, sales and marketing software. It comes with a hefty price tag and has been coined “Confusionsoft” by many of its users. For these reasons alone, I do not recommend Infusionsoft to those just starting out.
If you want a smooth start to your email marketing journey, look no further than ConvertKit.
Just some of ConvertKit’s features:
- Offer a Free Plan
- Tag-based Service
- Send Unlimited Emails
- Great Support via Email and Live Chat
- Active Community via Facebook Group
- Good Integrations with 3rd-Party Apps
- Customizable Opt-In Forms
- Landing Pages and Templates
- Easy to Use Email Editor
- Custom Email Templates
- Automatic Broadcast Resend
- A/B Split Testing
- Good Automations
- Workflow Visual Editor
- Auto-Upgrade your account based on subscriber count
- Great Deliverability
- Reliable Support Team
- 30-day refund policy
MailerLite: Another email marketing provider that boasts an impressive list of up-to-date features at a budget-friendly price.
Just like ConvertKit, MailerLite also offers a free plan for up to 1,000 subscribers. It includes email automation, which gets it a huge thumbs up! But some key features are missing and you’re limited to 12,000 emails per month, so that’s something to keep in mind.
If you’re keen to get started with email marketing but your budget doesn’t stretch to ConvertKit, then I’d look no further than MailerLite. At the speed they’ve been developing, you’ll be in very safe hands.
Just some of MailerLite’s features:
- Tag-based Service
- Send Unlimited Emails (there’s a 12,000 emails per month limit on the free plan)
- Great 24/7 Support via Email and Live Chat
- Active Community via Facebook Group
- Good Integrations with 3rd-Party Apps
- Easy to Use Drag & Drop Email Editor
- Newsletter Templates
- Pop-Up Subscribe Forms
- Embedded Sign-Up Forms
- Landing Pages
- Email Automations
- Automatic Broadcast Resend
- A/B Split Testing
If you see yourself taking your website/business down a more advanced route, selling multiple products and services, perhaps my final recommendation is a better match for you…
ActiveCampaign: Of the four recommendations, ActiveCampaign is arguably the most powerful in terms of automation.
It is also the most expensive (if you want their advanced features). Due to the cost, you could argue that ActiveCampaign shouldn’t make my list of recommendations. But I’d be doing you a disservice if I didn’t mention them.
ActiveCampaign is the email marketing automation service I see getting the most recommendations in the “internet marketing community”.
The only downsides I’ve heard are you may experience slow load times and the user experience could be better.
Just some of ActiveCampaign’s features:
- Tag-based Service
- Send Unlimited Emails
- Great Support via Email & Live Chat
- Active Community via Website Forum
- Great Integrations with 3rd-Party Apps
- Easy to Use Email Editor
- Customisable Email Templates Library
- Automatic Broadcast Resend
- A/B Testing on Automation & Broadcast Emails
- Workflow Visual Editor
- Great Automations
- Automation Marketplace: Share & Install Other Users Automations
- Lead Scoring (advanced feature available via an upgraded price plan)
- ActiveCampaign do not provide partial or full refunds

What about AWeber?
If you know anything about email marketing, you’ve probably heard of AWeber. They’re the best-known email marketing service provider.
This section of the tutorial wouldn’t be complete if they didn’t get a mention.
In fact, I used to recommend AWeber, and they were the email service I used. But times change and they’re outdated.
Don’t get me wrong, they’re still a solid company and they offer outstanding customer support. But there are many better services available nowadays.
I have your best interests at heart and that is why I no longer recommend AWeber.
Ultimately, the choice is yours.
Take a look at the services I recommend. Check who offer the features and integrations you need and sign up for a trial.
Disclosure: I am currently using an email marketing provider I haven’t listed above. The reason for this is that I am a founding member locked in at a special lifetime price. The reason I’ve not listed it here is that it’s a lot more technical and not as user-friendly as my recommendations.
Step 22: How To Set Up An Email Autoresponder
Once you’ve signed up to your email marketing provider of choice, the next steps are to set up your first email campaign and create a web form.
For the purposes of this tutorial, I’ll provide brief instructions for doing this with ConvertKit:
Getting Started with ConvertKit
Once logged in to your ConvertKit account, first, you’ll want to complete Your Profile and modify your Account Settings.
To locate these settings, click on your name in the upper right-hand corner of your ConvertKit account.

This will display a menu where you’ll find access to Your Profile and Account Settings.
To get started, complete the Your Profile, General (Account Info) and Email sections. It’s a simple process that just requires some of your business and website details.
On the Email Settings page, make sure you enter a valid Postal Address or PO Box. You must include this to comply with CAN-SPAM regulations.
I also recommend that you tick Add subscriber_id parameter in email links.
Don’t forget to click the Save Settings button.
Note: If you want to take advantage of automated funnels and email sequences and/or integrations, complete the Billing section.
Once that’s done, I recommend you install the ConvertKit WordPress plugin on your blog.
Install the ConvertKit WordPress Plugin
Click on the Plugins option in the left-hand menu of your WordPress Dashboard and then click on Add New.
Search for ConvertKit. Once you’ve located it, click Install Now and then Activate the plugin.

Now the plugin is active, click on the Settings option in the left-hand menu of your WordPress Dashboard and then click on ConvertKit.
You’ll be taken to the ConvertKit settings page. Enter your ConvertKit API Key and API Secret and then click the Save Changes button.
You can find your API Key within your ConvertKit account. It’s located in Account Settings under Account Info.
ConvertKit is now installed on your website and able to identify your email subscribers. This allows you to customize the content that is displayed on your website for existing subscribers.
Create an Opt-In Form with ConvertKit
To create an opt-in form, once logged into your ConvertKit account, navigate to Landing Pages & Forms and click the Create New button.
You’ll be presented with the option to create a Form or Landing Page. Click on Form.
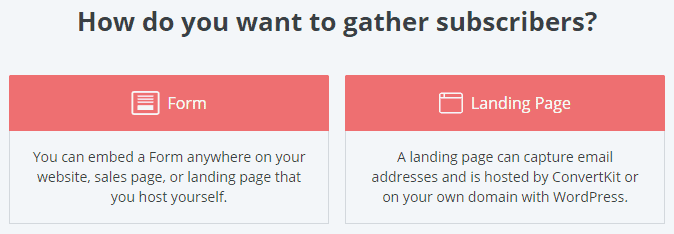
Next, you’ll see an option to choose the display format for the form. For this tutorial select Inline and then choose a template.
Once you’ve chosen a template, spend some time in the Form Editor and modify your form to your liking. Anything you can click on, you can edit. The edit options for the item you click to modify will appear in the right-hand toolbar once it’s selected.
Note: You can return to the main form style settings by clicking on the magic wand icon located on the left-hand side of the right-hand toolbar.
Once you are happy with the design, complete the Settings, Incentive Email and Advanced Settings sections. They can be found on the left-hand side of the right-hand toolbar.
Double Opt-In
Pay particular attention to the Incentive Email section.
I recommend that you use double opt-in to make your subscribers confirm that they want to be on your email list. It will protect against fake subscribers and should lead to higher engagement and better deliverability.
Double opt-in is enabled by default in ConvertKit. Each time you create a form, make sure that Send incentive email is ticked, and Auto-confirm new subscribers is not ticked.

Now the form design and settings are complete, click the Save button.
Note: We’ll come back to the Embed tab later, once we’re done with a few more settings.
| Form Design: Check! | |
| Double Opt-In: Check! | |
| Emails Ready to Send: Not yet… |
You can guess what the next step is, right?
It’s time to create your welcome email(s).
Create an Email Campaign with ConvertKit
This is the step where you will set up your welcome campaign emails.
Note: If you signed up for ConvertKit’s free plan, you will not be able to do this step. You’ll have to manually send email broadcasts instead. Automated funnels and email sequences are only available on the ConvertKit paid plans. I’d struggle to run my business without automation.
Each time someone subscribes to your email list, you’ll want to send them a series of emails to welcome them to your email list, tell them about your business, etc. This should be done via automation to make sure they receive this information as soon as they sign-up.
Broadcast emails are typically sent as a one-off on a specific date and time. Sequence emails are for automated content that you want to send each time a certain event happens, such as when someone signs up to join your email list.
To set up an email sequence in ConvertKit, navigate to the Automations screen and then click on Sequences.

Next click on New Sequence to create your first email in your welcome campaign.
Give your sequence a name, such as ‘Welcome’, and click Create Sequence.
The next screen you’ll see will be ConvertKit’s email editor. This is where you will compose your email(s).
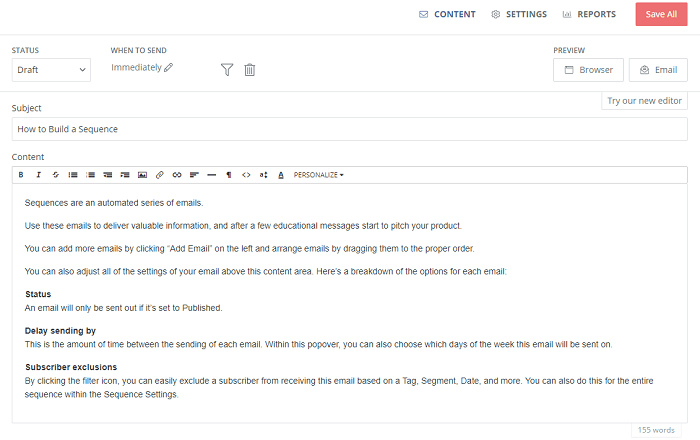
Go ahead and give your email a Subject and fill out the Content of your welcome email.
Once you’re happy with the email draft, change the When To Send to 0 (zero) days. This will automatically change to Immediately which is when you want the first email in your welcome sequence to send.
Next, change the Status to Active.
If you want to add more emails to your welcome campaign, click the + Add Email button. This will create another draft email for you to complete. Once again, complete the email fields, change the Status to Active and edit the When To Send, but this time don’t set it to 0 (zero) days.

You will want to send the next email(s) in your sequence within a few days of the previous email.
Repeat the above steps for any further emails you wish to add to your sequence and then click the Save All button.
Link Your Email Campaign To Your Opt-In Form With ConvertKit
Once you have your opt-in form and email welcome sequence created the next step is to link them together so that when someone signs up for your email list, they’ll immediately begin to receive your emails on autopilot.
Navigate your way to the Automations page and then click the New Automation button.

On the next screen, you can give your automation a name by clicking on the pencil icon next to the existing visual automation name. Once that’s done, click on the Create Automation button.
You’ll be presented with a few options. Go ahead and select Joins a form and then select the name of the form you created earlier in the drop-down menu.
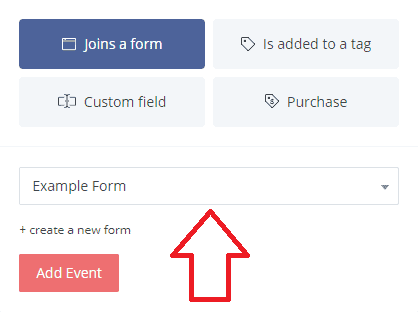
Click the Add Event button to complete this step. It will create a Form entry point.
Next, click the + icon that’s under the form entry point. From the choices, select Action and then click on Email sequence.
You will be presented with a drop-down menu. Use it to search for and select the name that you gave to your welcome email sequence. Finally, click the Add Action button.

ConvertKit Automations save automatically each time you add a new action.
To complete the automation, click on the toggle switch located near the top right-hand side of the screen. Its current status will show as ‘Paused’ but when you click it, you’ll be asked if you want to turn on the automation. Click the Turn it on! button.
Now when a blog visitor joins your email list via your ConvertKit opt-in form, they will automatically start to receive your welcome email(s).
For that to happen, the opt-in form needs to be on your blog.
Add a ConvertKit Opt-In Form to Your Blog
There are a number of ways that you can add a ConvertKit opt-in form to your blog. You can embed the form onto your site with a line of JavaScript code, with some HTML code or via a shortcode if you have the ConvertKit WordPress plugin installed and activated.
To locate the code you need, within your ConvertKit account, navigate to Landing Pages & Forms and click on the form you created earlier in this tutorial.
This will take you back to the form editor screen. Click Embed near the top right-hand side of the page and you’ll see the embed options for your form.
Embed a ConvertKit Opt-In Form with JavaScript
ConvertKit recommends that you use the JavaScript embed option. The reason is that any changes you make within your ConvertKit account will automatically reflect on your website.
To embed the form onto your blog with the JavaScript method, copy the JavaScript code and paste it into the section of your website you want it to appear using a Custom HTML block. If you’re unsure how to do this, I guide you through adding a form to your blog sidebar in the next step of this tutorial.

ConvertKit’s JavaScript embed code is formatted as HTML, that’s why you need to use a custom HTML block to add it to your post or page.
Embed a ConvertKit Opt-In Form with HTML
It’s unlikely, but if you need to modify the form’s HTML, copy the HTML code and paste it into a Custom HTML block on your post or page.
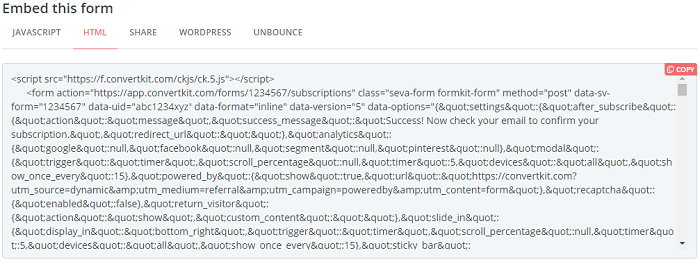
Just make sure that you do not change the form action, data-sv-form and data-uid information. The ConvertKit form will not work correctly without these.
If you make any changes to this form in your ConvertKit account, the code will need to be re-copied and pasted onto your site. Unlike the JavaScript embed option, the HTML embed will not automatically reflect changes on your website.
Embed a ConvertKit Opt-In Form with the ConvertKit WordPress Plugin
If you have the ConvertKit WordPress plugin installed, as suggested earlier in this tutorial, you can add ConvertKit forms to your blog’s posts and pages with a shortcode.
Simply copy and paste the WordPress shortcode onto your website where you’d like it to appear.

The plugin also allows you to add forms to the bottom of every blog post. You can set this on the plugin’s Settings page or select a form from the new box that the plugin adds below the content editor for each blog post. Forms chosen via the box that’s below the content editor will override the setting on the plugin’s Settings page.
Note: If you choose to embed your form within one of your blog posts or pages, make sure the display format for your form is set to Inline. The other options such as ‘Modal’ or ‘Slide In’ will not work.
You can also integrate ConvertKit and other email marketing services with lead capture apps that allow you to build your mailing list with:
- Pop-ups
- Slide-ins
- Sticky Ribbons / Notification Bars
- Locked Content
- Optimization Features
- Advanced Targeting and More…
If you’re interested in doing this on your website, check out the Social Sharing & List Building section of my Resource page. It lists my current recommendations.
Note: These option names change every so often so I can’t promise they’ll be labelled the same as I’ve said above. However, they’ll be named something similar and relevant, so you should have no problems performing the steps. However, if you experience any trouble, you’ll likely be able to find the answer in ConvertKit’s Knowledge Base.
Step 23: How To Add an Email Subscription Opt-in Form
To add an email opt-in form to your blog sidebar in WordPress, navigate to Appearance >> Widgets located in the left-hand menu of your WordPress Dashboard.
From within your Widgets screen, expand the widget location that you want your opt-in form to appear (e.g. Primary Sidebar or Sidebar 1).
From here, drag and drop the Custom HTML widget into the widget location you’ve just expanded.
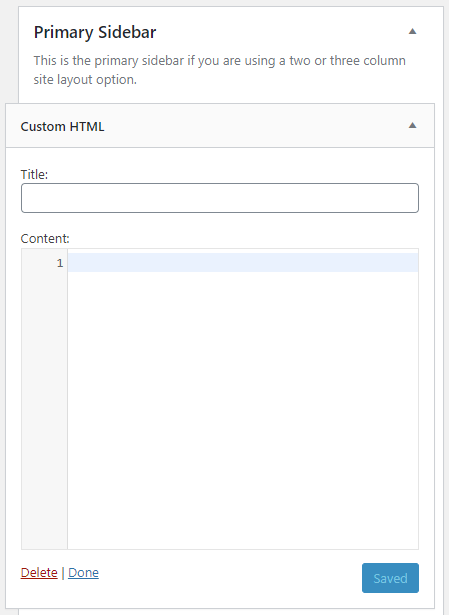
Next, expand the custom HTML widget (if it doesn’t expand automatically). It will display fields where you can input a Title and Content.
Now, all that’s left to do is paste the JavaScript code for your email opt-in form (mentioned above) into the Content field of the Custom HTML widget box. Then click the Save button.

Alternatively, if you have the ConvertKit WordPress plugin installed, you can drag and drop the ConvertKit Form widget into the widget location and select your form from the drop-down menu and then click the Save button.
That’s it, you’re done. Your website now has an opt-in lead generating form to collect your visitors’ email addresses. It will automatically send out a welcome email campaign when the user submits the form.
Great job! You can now start to build your email list.
Use this list wisely and the larger it grows, the more success you should have.
A Job Well Done
You’ve now completed this tutorial on how to set up a WordPress Blog. If you stuck with me through each step, you’ll now have your own platform that you can use to begin your journey to a profitable online business.
If you know others that could benefit from this tutorial, please share the link to this post with them. Also, feel free to link to this post and if you would like to embed the video on your own website, you’re very welcome to do so.
What To Do Next
The obvious answer here is to start blogging. You’ve got the platform so put it to use.
If you’d like a few more pointers to help you get going, then I recommend you:
- Create an About page for your blog. This should welcome people to your site, tell them about you and/or your company, and explain why your blog will help them.
- Start collecting ideas for your blog posts. I do this using an application called Evernote. It’s definitely one of my favourite apps. One of the best features is that it syncs across multiple devices. So no matter where you are, you can always add to your notes.
If you’re interested in the other tools and applications I use to help me run this blog, then head over to my Resources page. - Add a logo to your blog. You can make your blog look more professional by adding a logo to your header. I recommend taking a look at the following websites for this:
As with most things, you get what you pay for. With 99 Designs, you list the details for your logo, choose how much you’re willing to pay and then launch a design contest.
Graphic designers will submit their designs to your contest. You’ll be able to give feedback to help them and the other designers shape their ideas to your needs.
Once the contest time is up, you pick your favourite logo as the contest winner. The designer is paid and you receive your logo. - Install a cache plugin. This can help improve your audience’s experience of your blog by speeding up the page load times. I recommend that you try either:
- WP Super Cache: A simple solution
- W3 Total Cache: A more complex solution
- Cache Enabler: I talk about this plugin more in my post that details how to speed up WordPress.
They’re all free.
Once you’ve done the above, you could head back to my Start Here page for more ideas to further your blogging journey. Or take a look through my other blog posts. They are all written with one goal; to help you.
Conclusion and Thank You!
Phew! You made it to the end. I know it’s a lengthy post, but I wanted to make sure I covered everything I thought you needed to start a blog online.
Well done if you took action and completed each step following it through to the end.
If you read this post and are yet to take action, remember:
As always, thank you so much for your support.
Are you interested to see how I use my Autoresponder account to communicate with my list? Just enter your name and email in the box below.
As a thank you, you’ll also get instant access to my affiliate marketing guide as a free gift! I hope you enjoy it and find it useful.
You can unsubscribe at any time, but I’ll do my best not to disappoint you by providing plenty of value.
I also invite you to come and join the discussions on my Facebook Page. I look forward to hearing from you!
I hope this post gets you started on an exciting journey. I’d love to hear from you along the way.
If you completed this tutorial and now have your own blog, please let me know by leaving a comment below.
Feel free to ask questions or provide feedback too. The easier I can make this for you, the better.
Resources Mentioned In This Tutorial
Click Here to View the Resources
Website Hosting
Domains Registrar
WordPress Plugins
- Yoast SEO
- iThemes Security or More Advanced WordPress Security solutions
- UpdraftPlus WordPress Backup Plugin or More Advanced WordPress Backup solutions
- Contact Form 7 or More Advanced WordPress Form solutions Google Analytics Dashboard Plugin for WordPress by MonsterInsights
- WordPress Share Buttons, Related Posts, Google Analytics – Shareaholic or More Advanced Social Sharing solutions
- Pretty Links – Link Management, Branding, Tracking & Sharing Plugin or Pretty Links Pro or Thirsty Affiliates Pro
Free Affiliate Marketing Guide
Premium WordPress Themes
Free Email Course
Books on Writing
- Accidental Genius by Mark Levy
- Bird by Bird: Instructions on Writing and Life by Anne Lamott
- On Writing: A Memoir of the Craft by Stephen King
Email Marketing Service Providers
